
Visual Studio Code has many plugin in supporting various programming languages. One of them is Java. One of pupular plugin of VSCode which supports Java is Extension Pack for Java. In this post will show you how to create Java project using maven by utilizing the VSCode plugin.
Creating Java (Maven) Project on VSCode
- Makesure we have Java SDK and VSCode installed in our system.
-
Install VSCode plugin Extension Pack for Java.
-
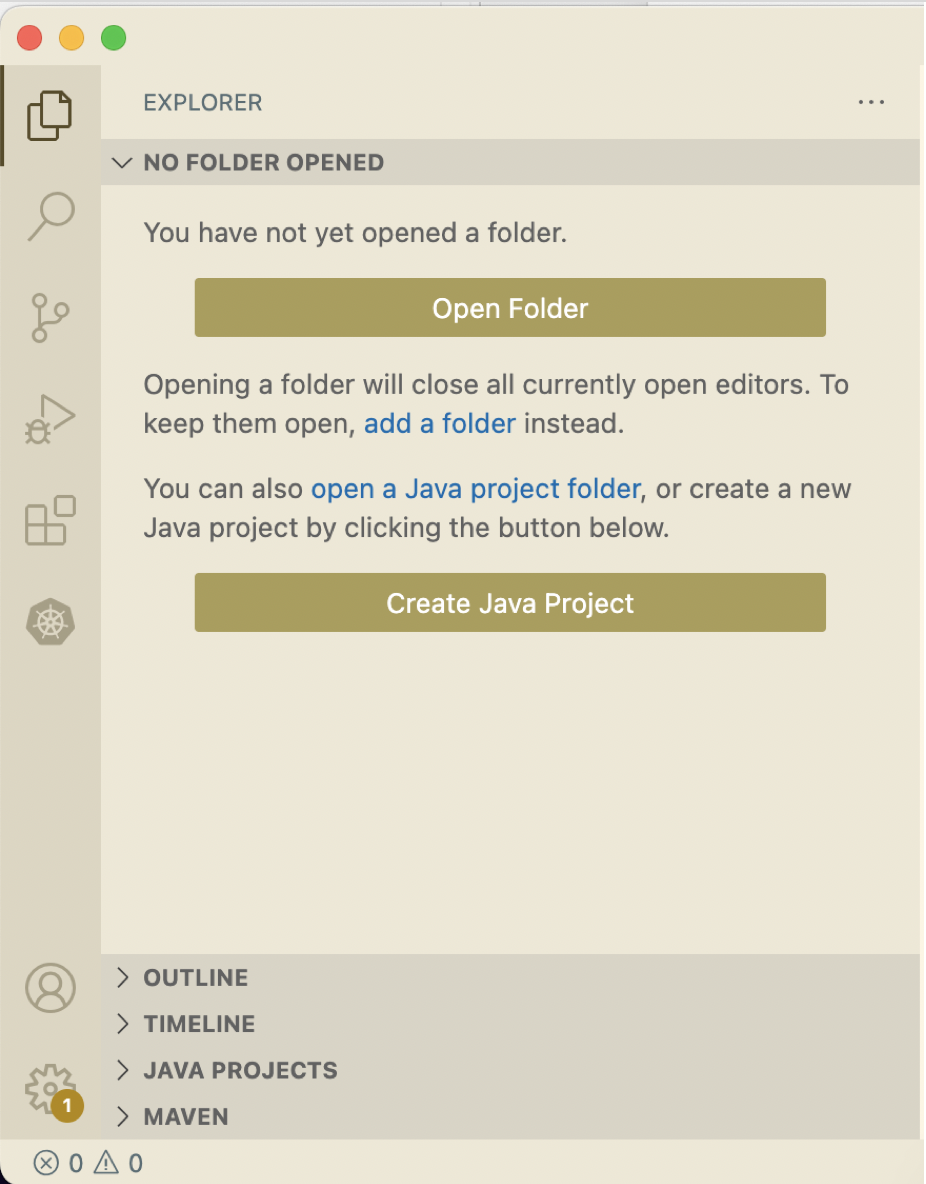
To create new project, select
Create Java Project. Then select type of project you want. In this post we will use maven based.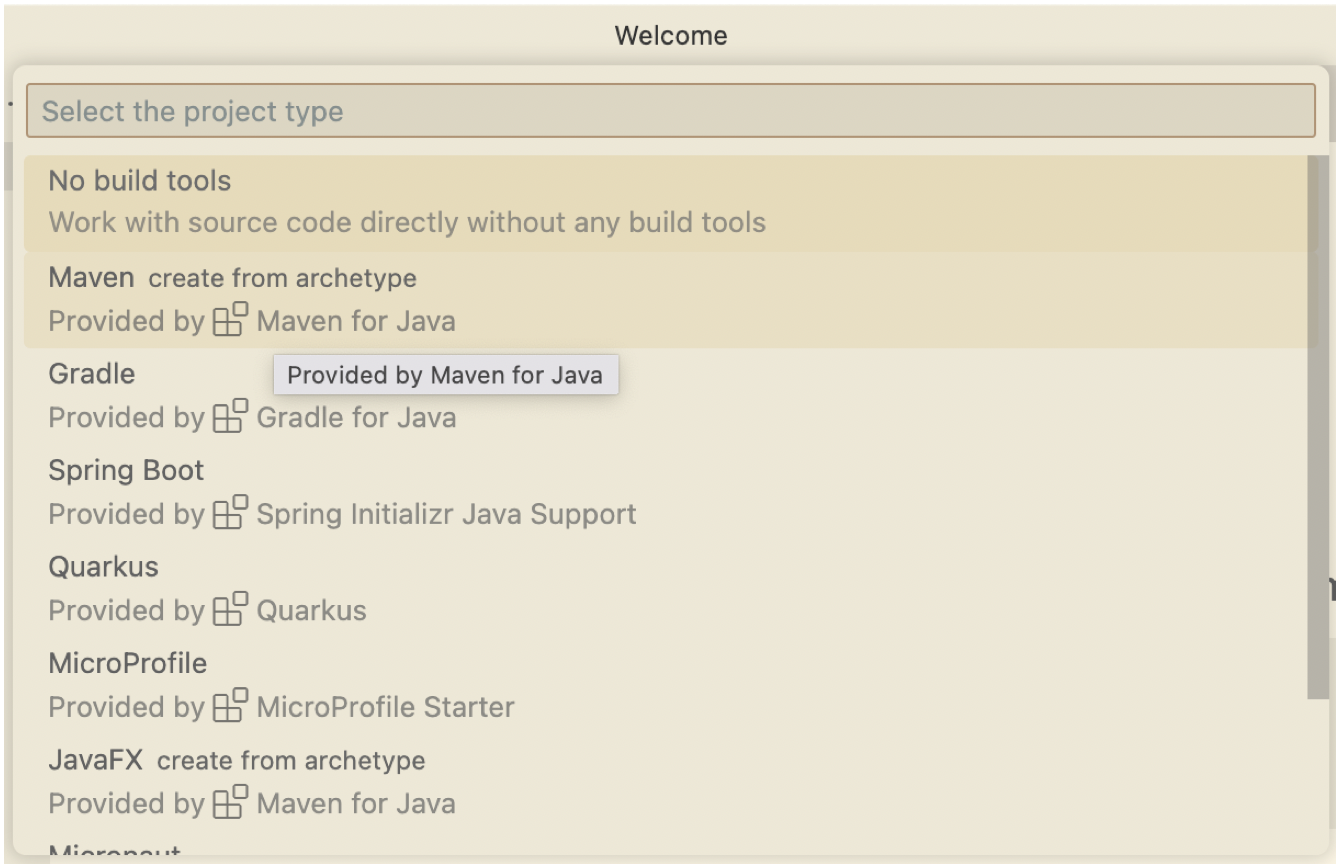
-
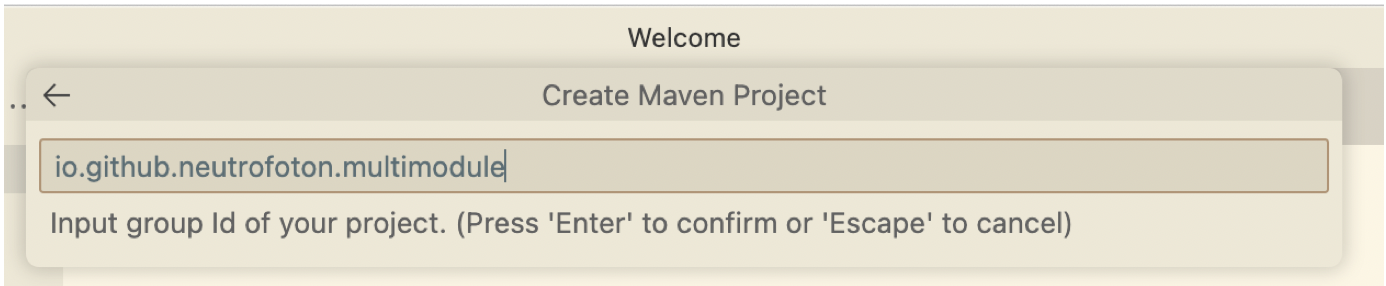
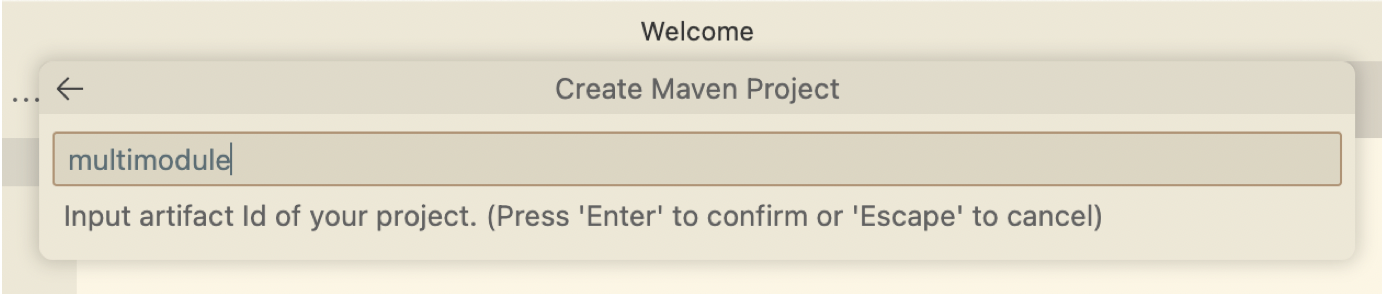
Fill out the maven project setting.
-
VSCode will generate a java project for you.
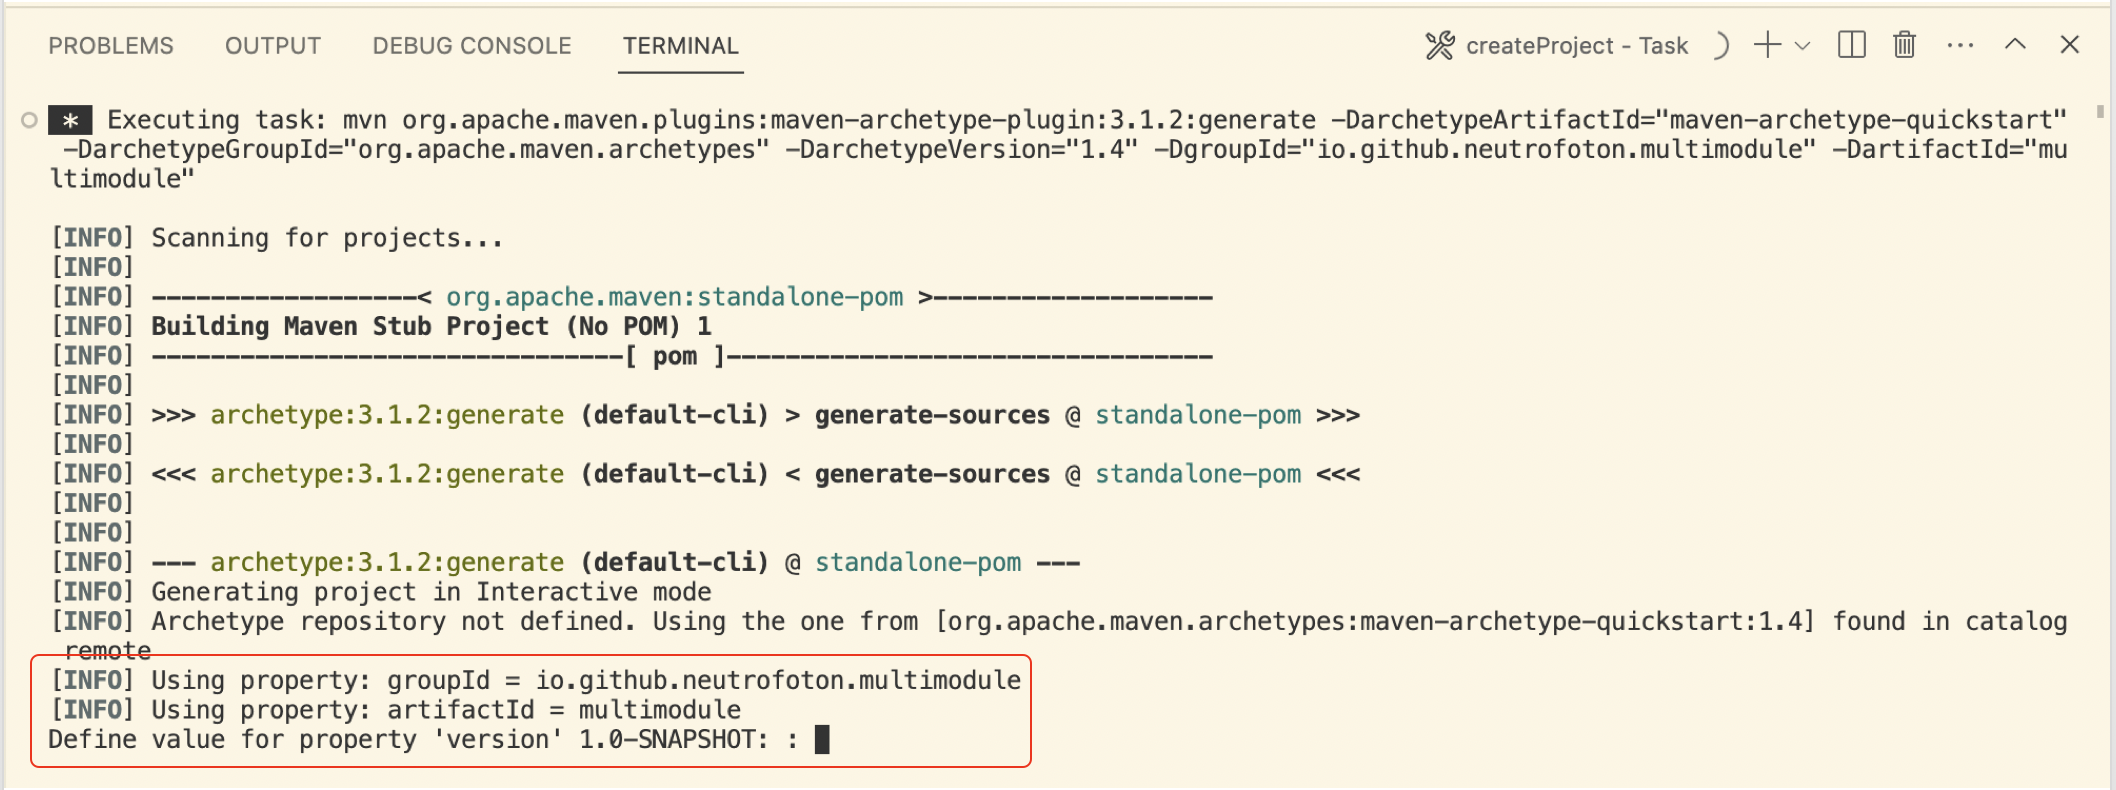
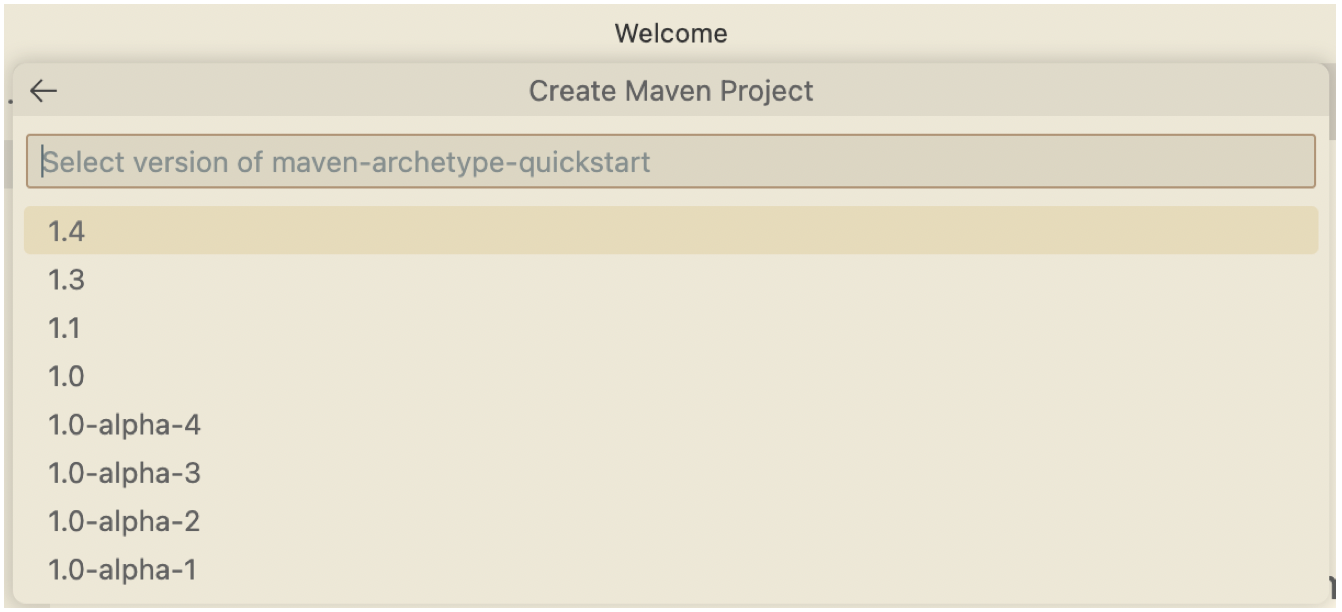
While generating the Java project, we will be asked for the version. If we agree with default version
1.0-SNAPSHOT, we just need to pressEnter. Then follow the next question in the terminal tab. -
Finally the Java project generated and displayed in the File explorer of VSCode.

Setup Maven Multi Modules Projects
To setup the previous Maven project as Maven Multi Modules projects, let’s do the following steps.
-
Delete the
srcandtargetfolder and their contents on the provious project. Then Edit the rootpom.xmlas below.<?xml version="1.0" encoding="UTF-8" standalone="no"?> <project xmlns="http://maven.apache.org/POM/4.0.0" xmlns:xsi="http://www.w3.org/2001/XMLSchema-instance" xsi:schemaLocation="http://maven.apache.org/POM/4.0.0 http://maven.apache.org/xsd/maven-4.0.0.xsd"> <modelVersion>4.0.0</modelVersion> <groupId>io.github.neutrofoton.multimodule</groupId> <artifactId>multimodule</artifactId> <version>1.0-SNAPSHOT</version> <packaging>pom</packaging> </project> -
Run maven
installto ensure thepom.xmlis valid.
-
If no error on step #2, then add a new maven project as a new maven module. To do that, right click on the VSCode Explorer > select
Create Maven Project.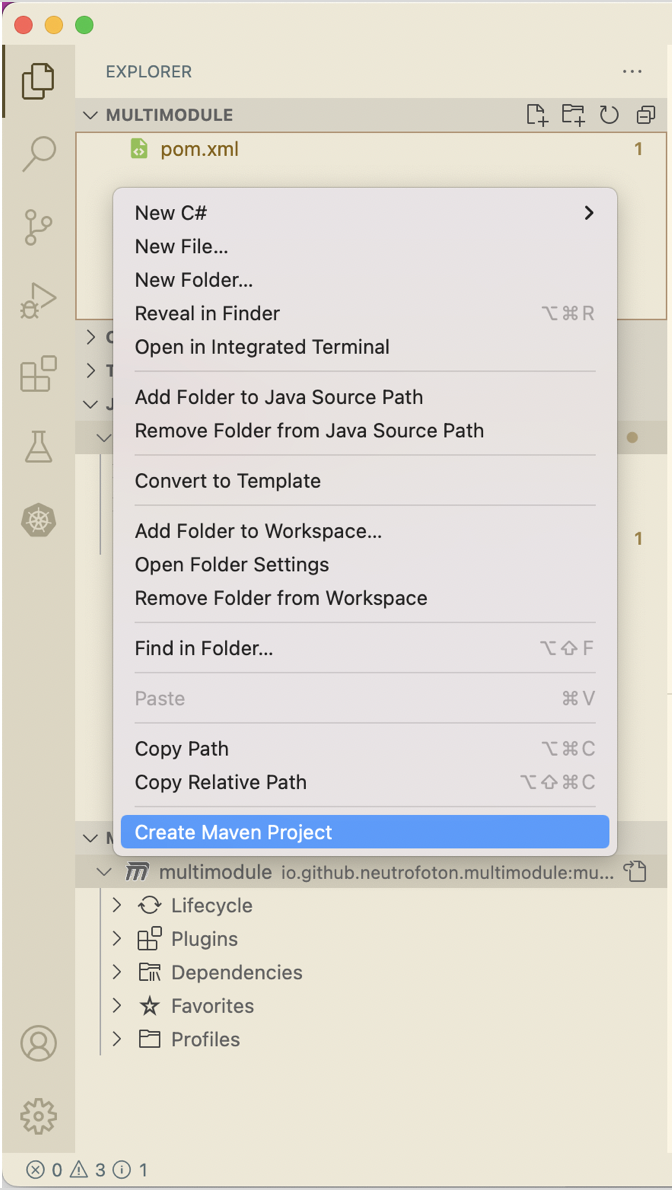
-
Fill out the group and artifact as we did previously.
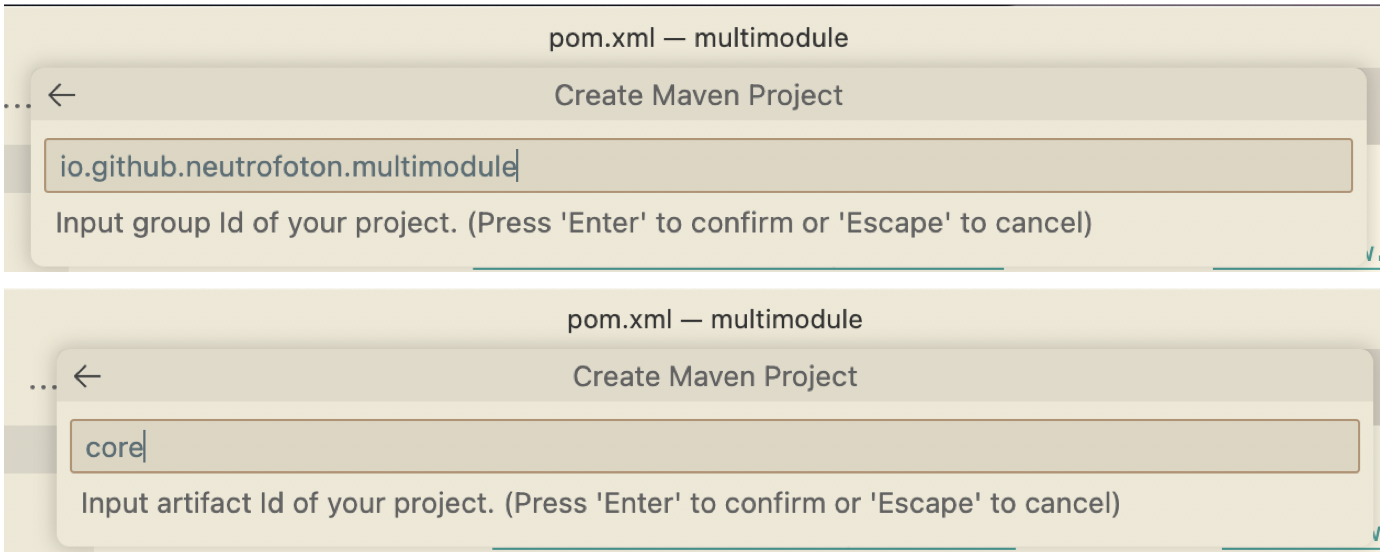
We use the sama group id as parent/root
pom.xml. But a new name for artifact, in this case we named itcoremodule. -
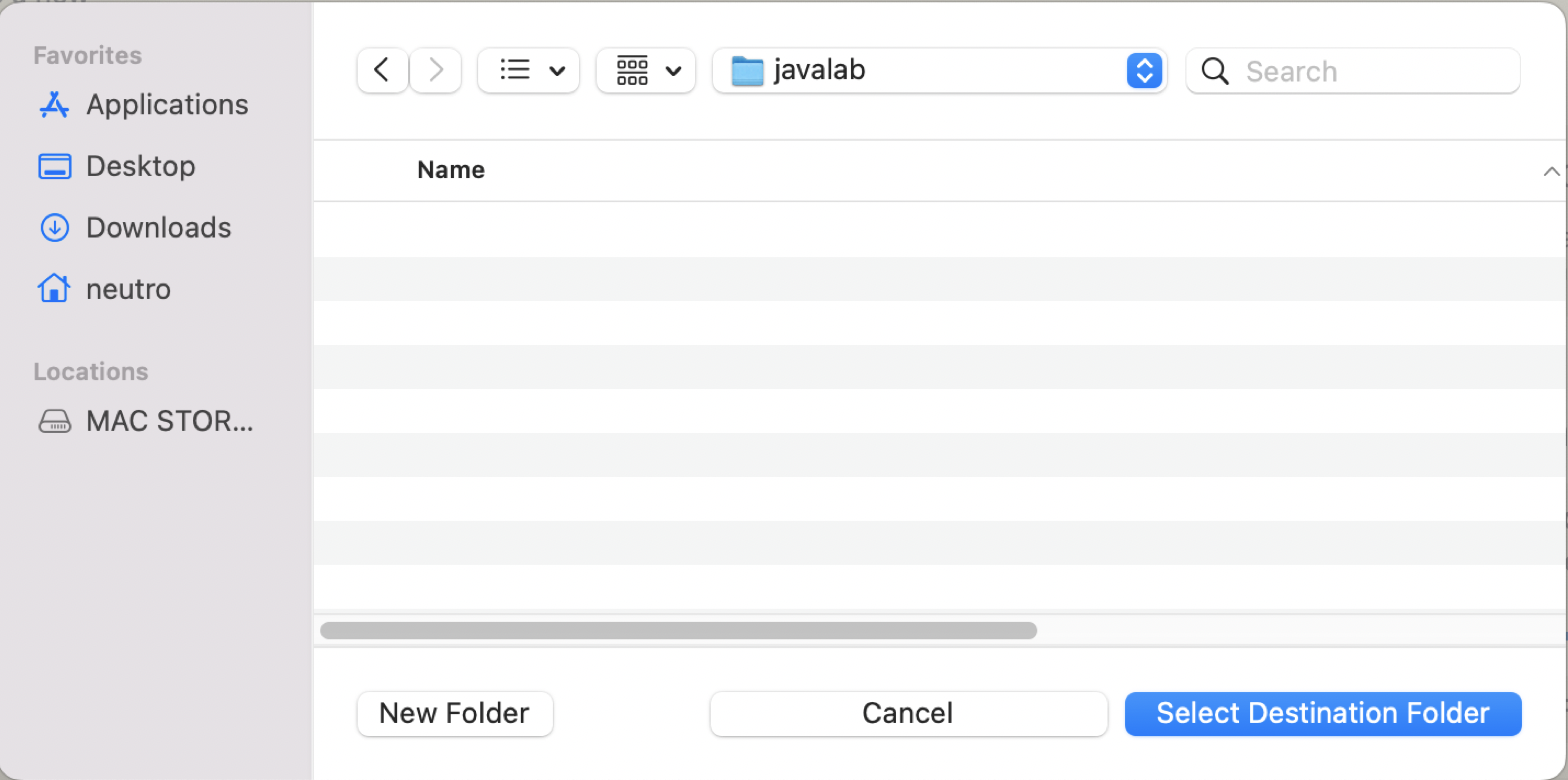
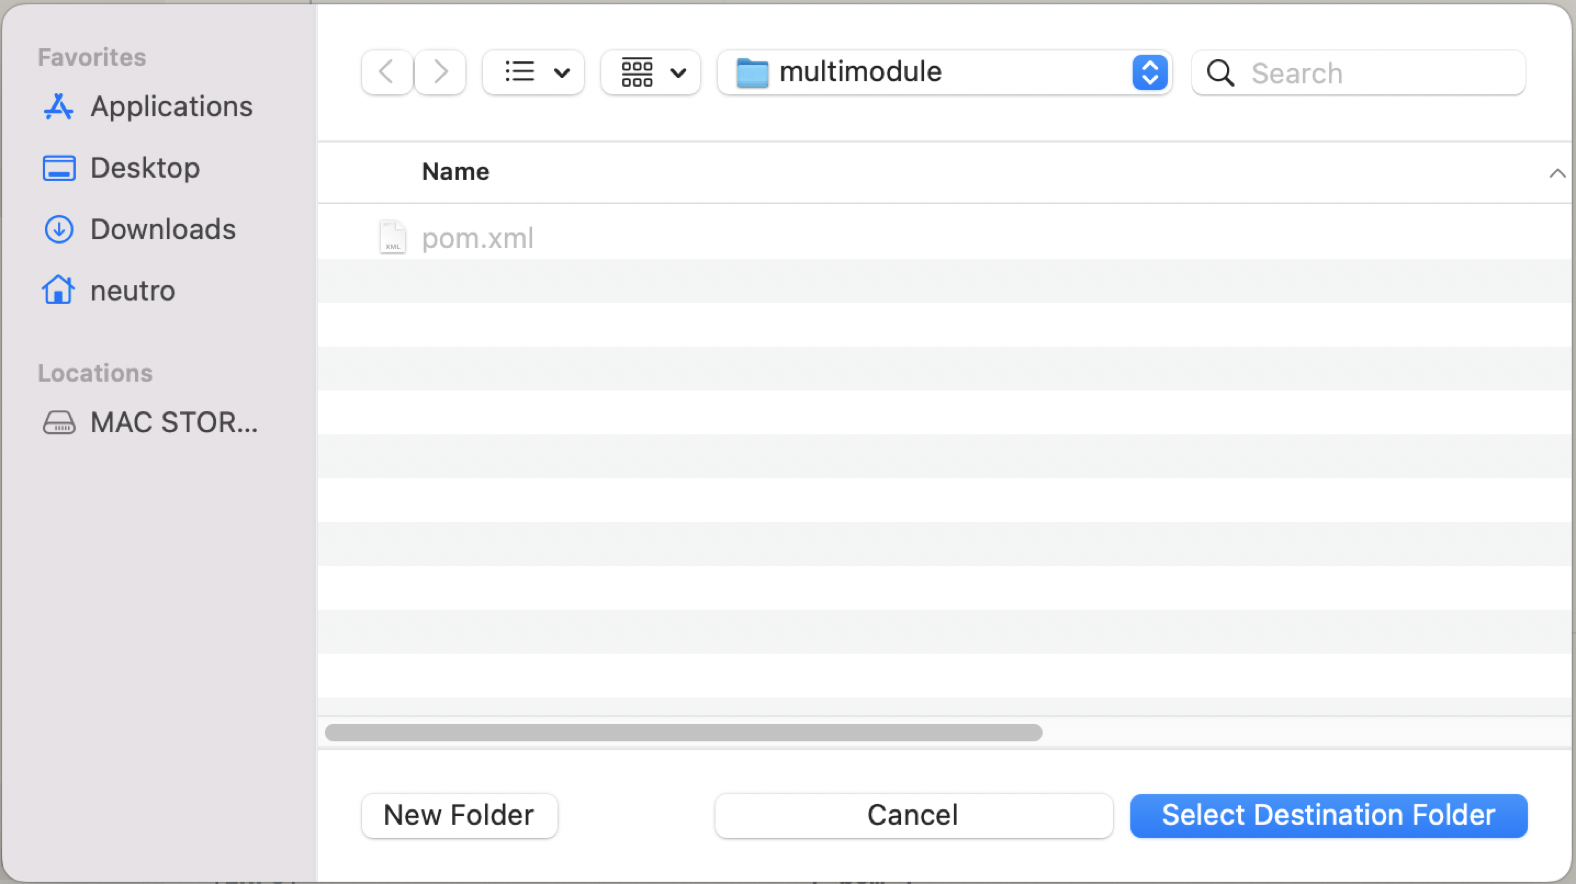
Select the destionation folder of the module iside the root/parent project.
-
Create another module called
appby repeating step #3 to #5. -
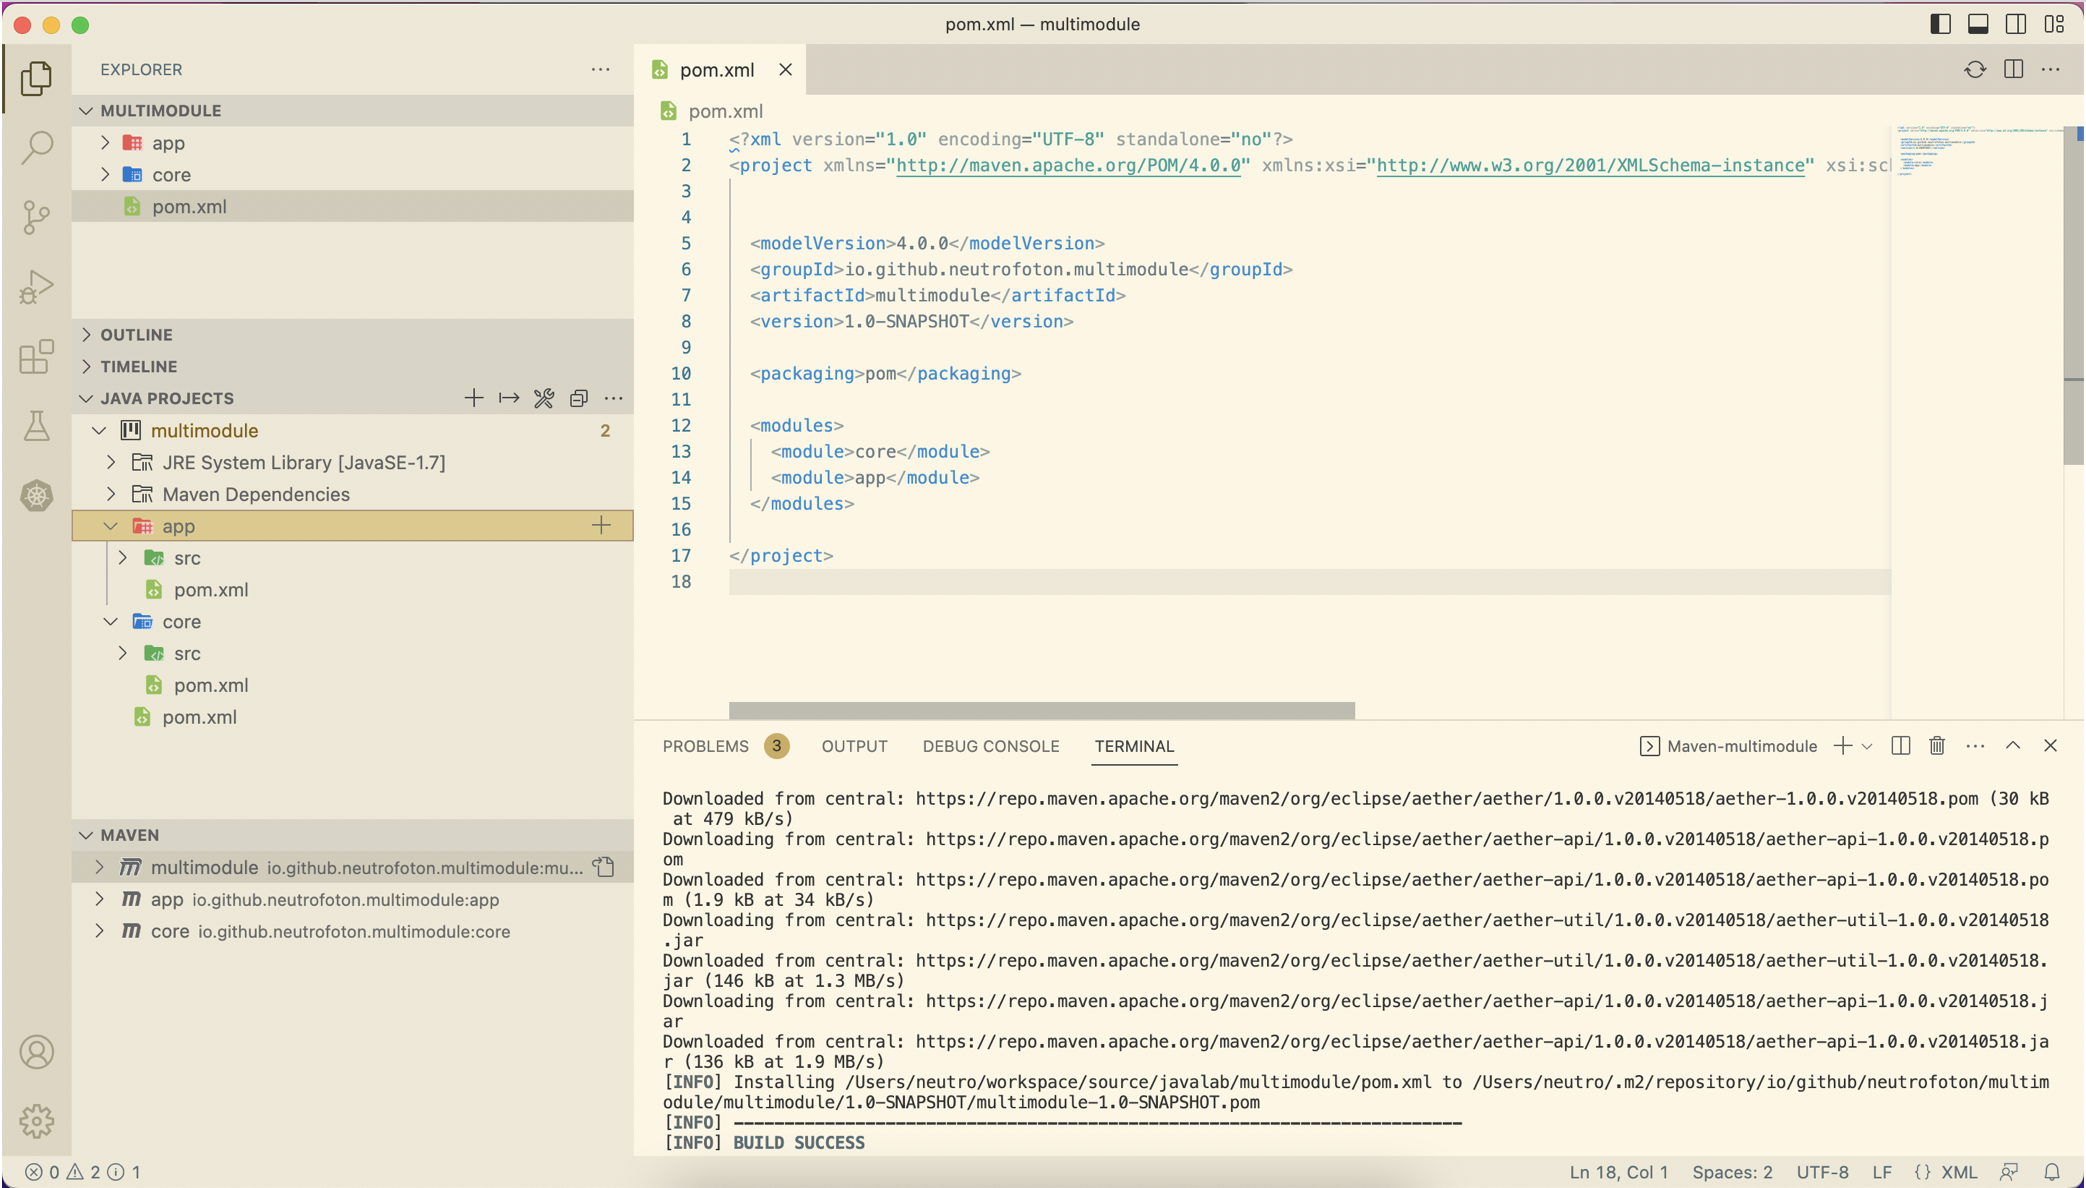
The
pom.xmlshould be updated as follow.<?xml version="1.0" encoding="UTF-8" standalone="no"?> <project xmlns="http://maven.apache.org/POM/4.0.0" xmlns:xsi="http://www.w3.org/2001/XMLSchema-instance" xsi:schemaLocation="http://maven.apache.org/POM/4.0.0 http://maven.apache.org/xsd/maven-4.0.0.xsd"> <modelVersion>4.0.0</modelVersion> <groupId>io.github.neutrofoton.multimodule</groupId> <artifactId>multimodule</artifactId> <version>1.0-SNAPSHOT</version> <packaging>pom</packaging> <modules> <module>core</module> <module>app</module> </modules> </project>And the project structure should be like this
-
To ensure the project well defined, we can run maven install on the root
pom.xml
Tips
To clear the plugin cache of the Java plugin, we can run
(MacOS) : CMD + Shift + P then typeJava: Clean Java language Server Workspace