20 Jun 2023
•
java
•
maven
•
spring
In this we would like to add a new Spring Boot Web API module to the previous Maven Multi Modules project. To do that do the following steps.
-
Install Spring Boot Extension Pack on the VSCode plugin central.
-
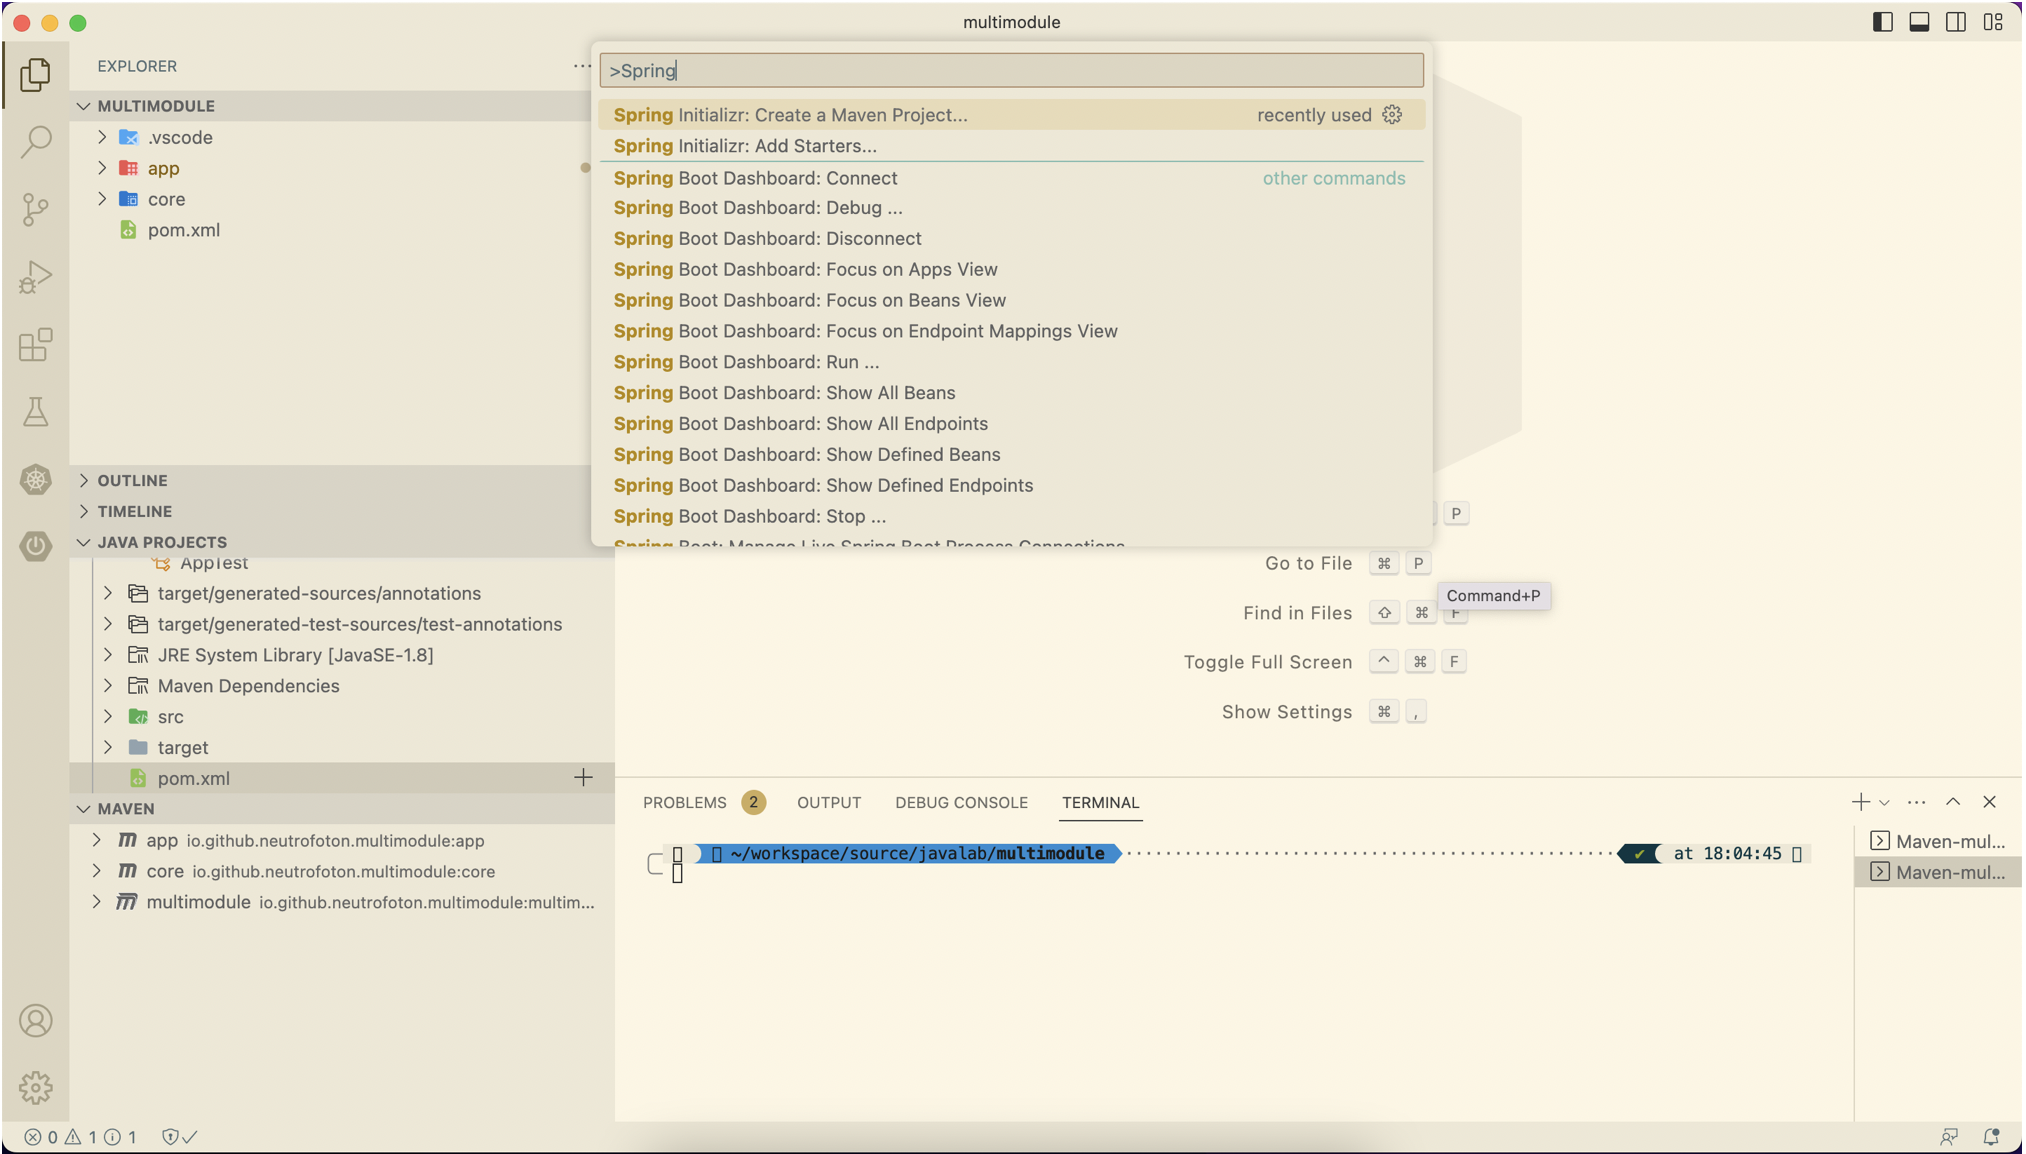
Open the previous project on VSCode and open command palette CMD + SHIFT + P (for MacOS). Then select Spring Initializr: Create a Maven Project
-
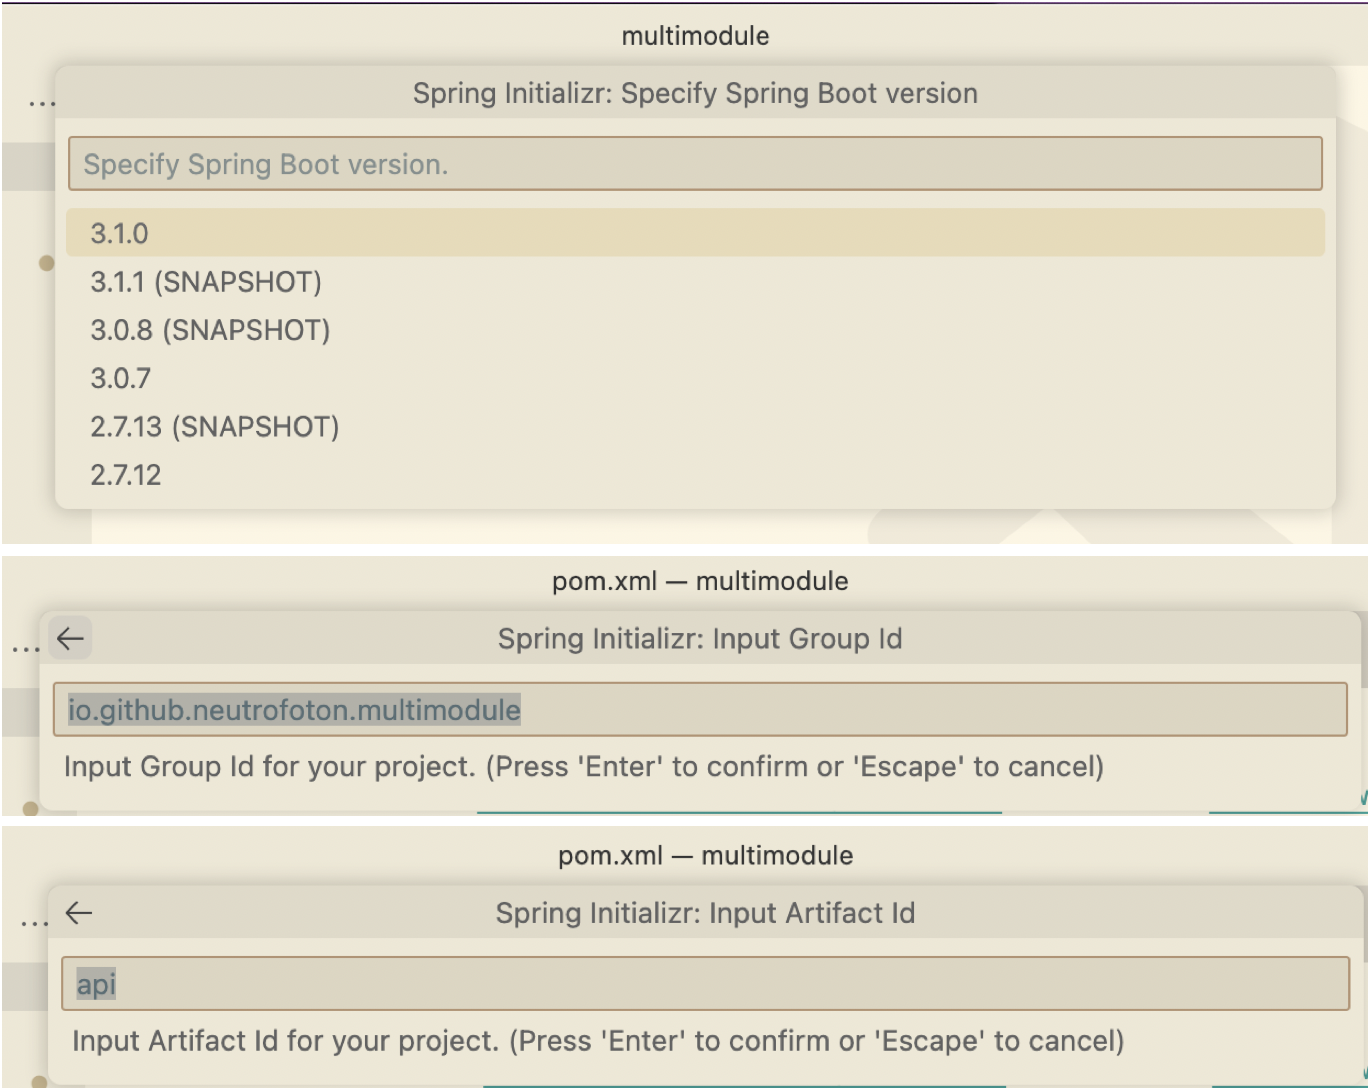
Select the Spring boot version, fill out the group and artifact id
-
Select the packaging and Java version

-
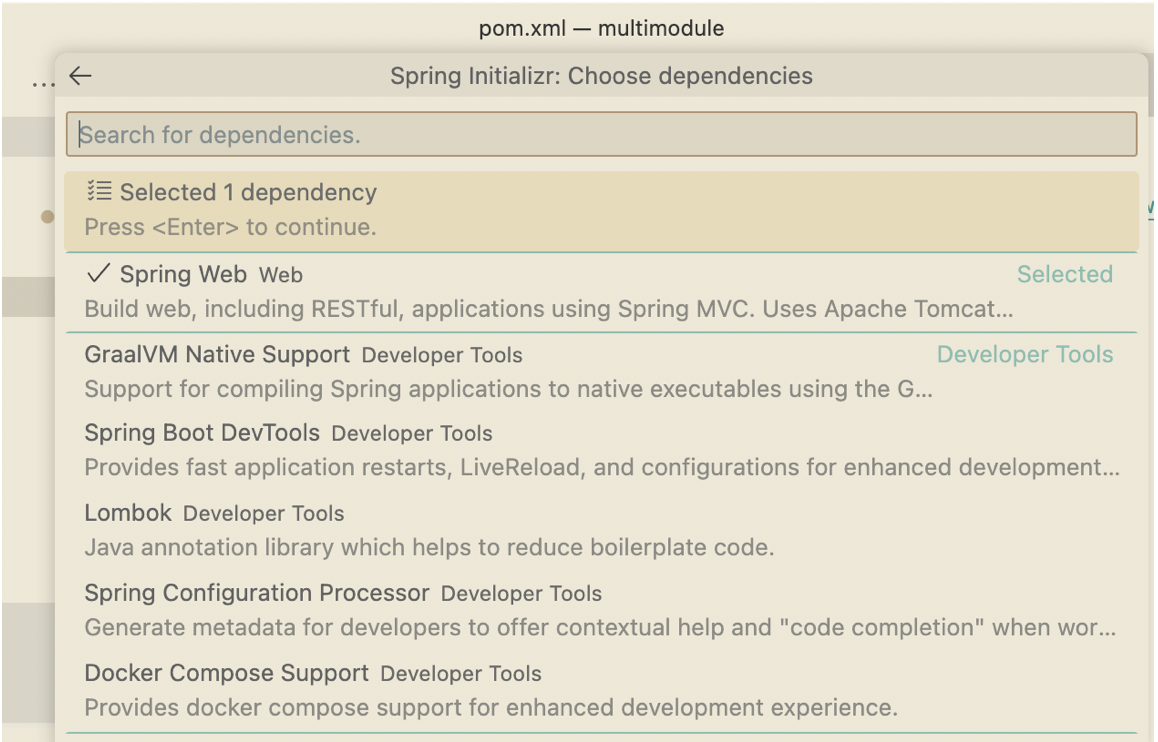
Select dependency of the Spring Boot
-
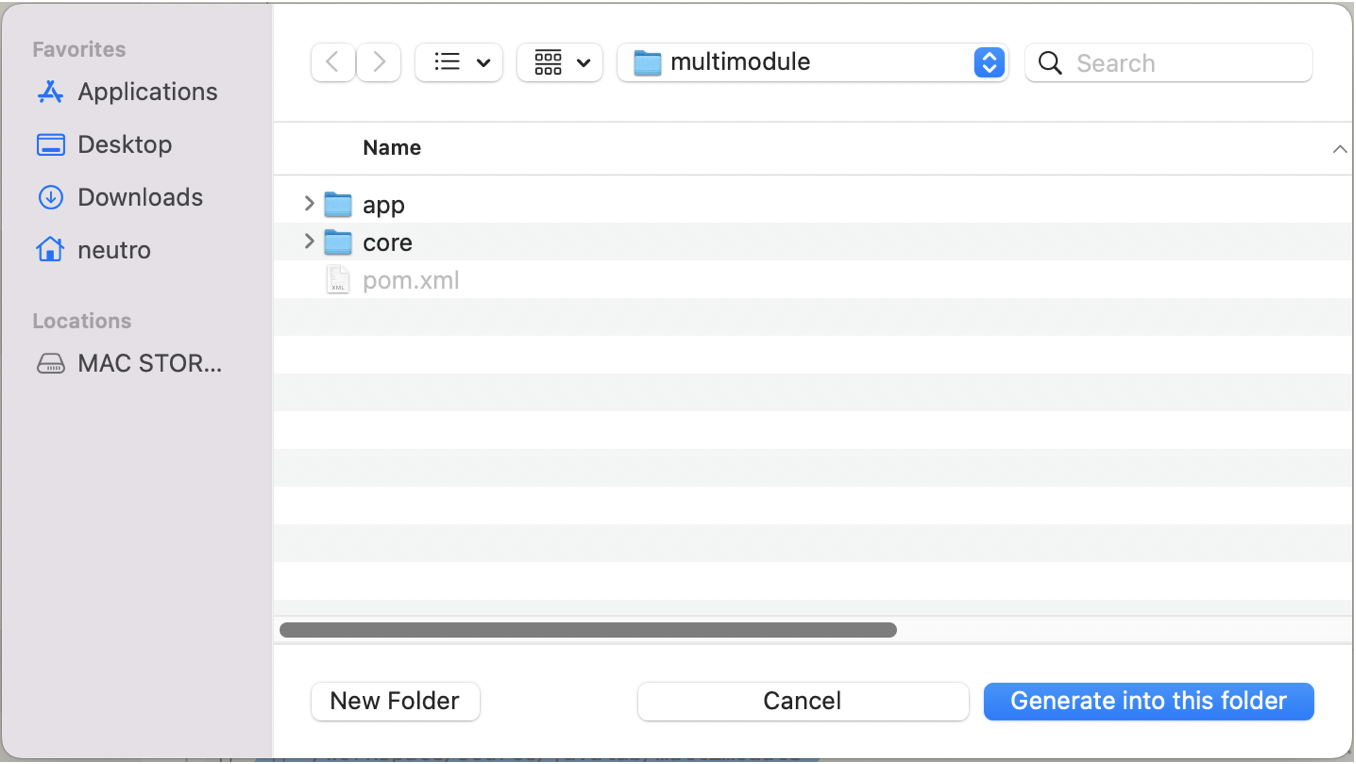
Finally select the module location as we did previously (inside the parent/root project)
-
Update the pom.xml of the Spring Boot project api by changing the parent to the root of the project.
<?xml version="1.0" encoding="UTF-8"?>
<project xmlns="http://maven.apache.org/POM/4.0.0" xmlns:xsi="http://www.w3.org/2001/XMLSchema-instance"
   xsi:schemaLocation="http://maven.apache.org/POM/4.0.0 https://maven.apache.org/xsd/maven-4.0.0.xsd">
   <modelVersion>4.0.0</modelVersion>

   <parent>
      <artifactId>multimodule</artifactId>
      <groupId>io.github.neutrofoton.multimodule</groupId>
      <version>1.0-SNAPSHOT</version>
   </parent>

   <groupId>io.github.neutrofoton.multimodule</groupId>
   <artifactId>api</artifactId>
   <version>0.0.1-SNAPSHOT</version>
   <name>api</name>
   <description>Demo project for Spring Boot</description>

   <dependencies>

      <dependency>
         <groupId>org.springframework.boot</groupId>
         <artifactId>spring-boot-starter-actuator</artifactId>
      </dependency>

      <dependency>
         <groupId>org.springframework.boot</groupId>
         <artifactId>spring-boot-starter-web</artifactId>
      </dependency>

      <dependency>
         <groupId>org.springframework.boot</groupId>
         <artifactId>spring-boot-starter-test</artifactId>
      </dependency>

      <dependency>
         <groupId>io.github.neutrofoton.multimodule</groupId>
         <artifactId>core</artifactId>
         <version>1.0-SNAPSHOT</version>
      </dependency>

      <dependency>
         <groupId>javax</groupId>
         <artifactId>javaee-api</artifactId>
         <version>8.0.1</version>
      </dependency>


   </dependencies>

   <build>
      <plugins>
         <!-- This plugin is optional if you like want to provide feature to let user build individual modules as well-->
         <plugin>
            <groupId>org.springframework.boot</groupId>
            <artifactId>spring-boot-maven-plugin</artifactId>
         </plugin>
      </plugins>
   </build>
   <repositories>
      <repository>
         <id>spring-milestones</id>
         <name>Spring Milestones</name>
         <url>https://repo.spring.io/milestone</url>
         <snapshots>
            <enabled>false</enabled>
         </snapshots>
      </repository>
      <repository>
         <id>spring-snapshots</id>
         <name>Spring Snapshots</name>
         <url>https://repo.spring.io/snapshot</url>
         <releases>
            <enabled>false</enabled>
         </releases>
      </repository>
   </repositories>
   <pluginRepositories>
      <pluginRepository>
         <id>spring-milestones</id>
         <name>Spring Milestones</name>
         <url>https://repo.spring.io/milestone</url>
         <snapshots>
            <enabled>false</enabled>
         </snapshots>
      </pluginRepository>
      <pluginRepository>
         <id>spring-snapshots</id>
         <name>Spring Snapshots</name>
         <url>https://repo.spring.io/snapshot</url>
         <releases>
            <enabled>false</enabled>
         </releases>
      </pluginRepository>
   </pluginRepositories>

</project>
More …
20 Jun 2023
•
java
•
maven
Visual Studio Code has many plugin in supporting various programming languages. One of them is Java. One of pupular plugin of VSCode which supports Java is Extension Pack for Java. In this post will show you how to create Java project using maven by utilizing the VSCode plugin.
Creating Java (Maven) Project on VSCode
- Makesure we have Java SDK and VSCode installed in our system.
-
Install VSCode plugin Extension Pack for Java.
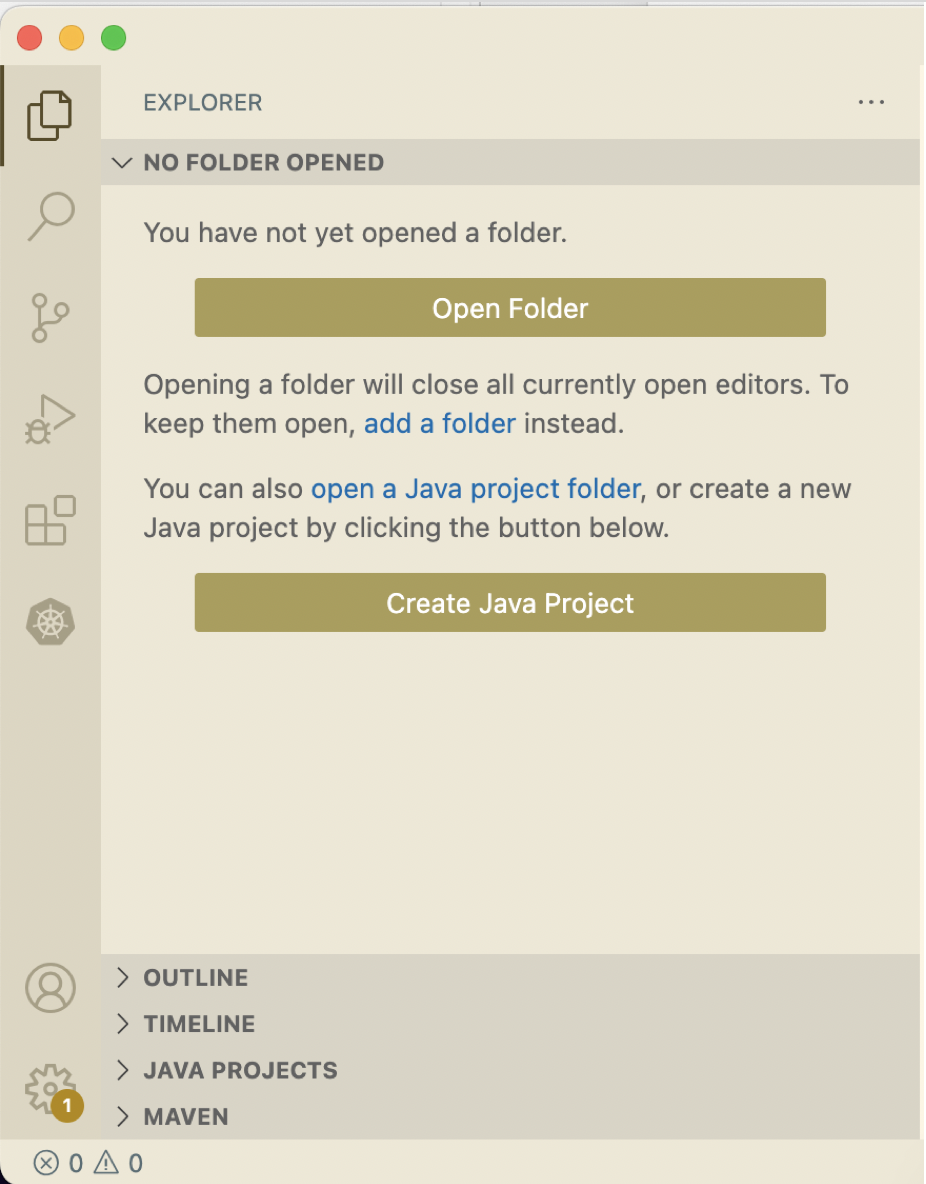
-
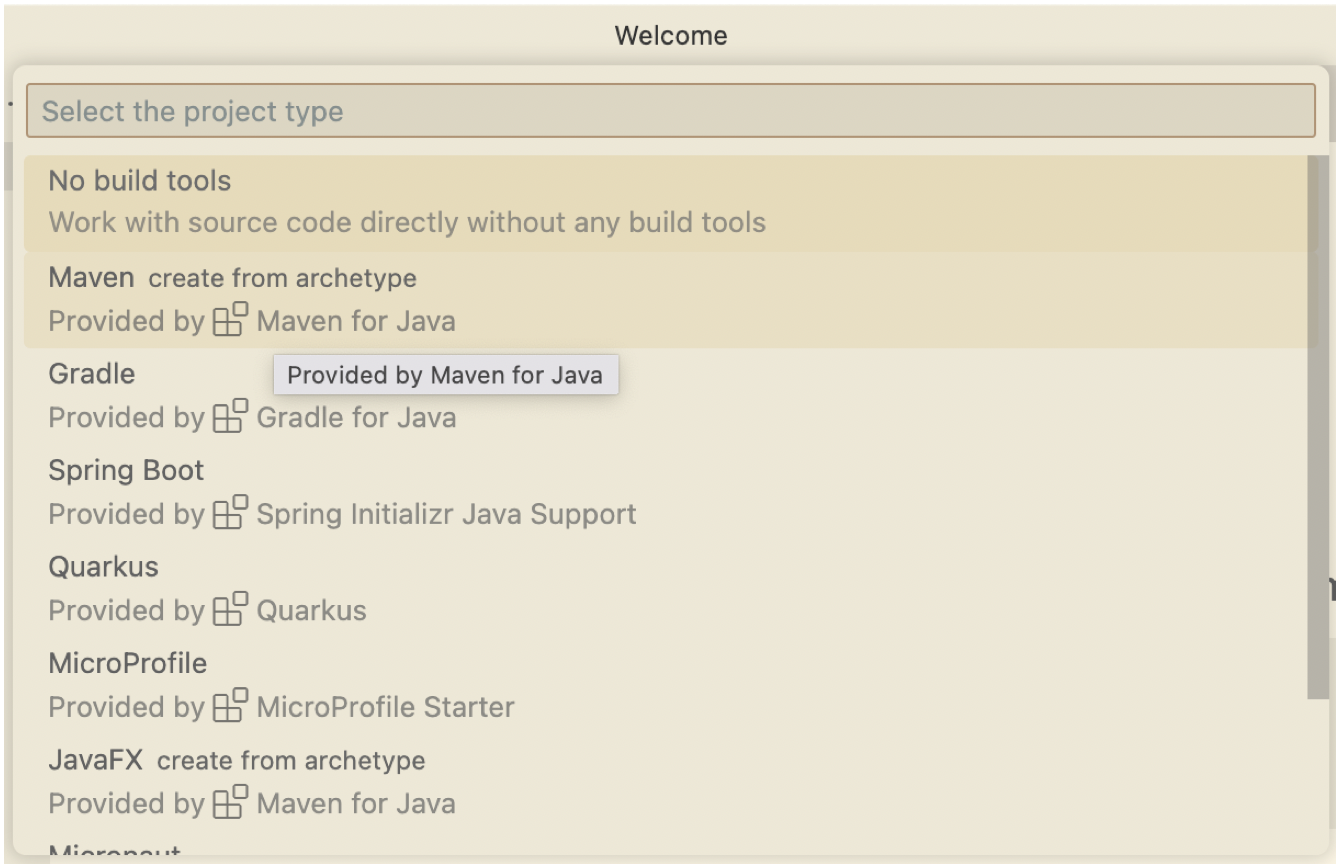
To create new project, select Create Java Project. Then select type of project you want. In this post we will use maven based.
-
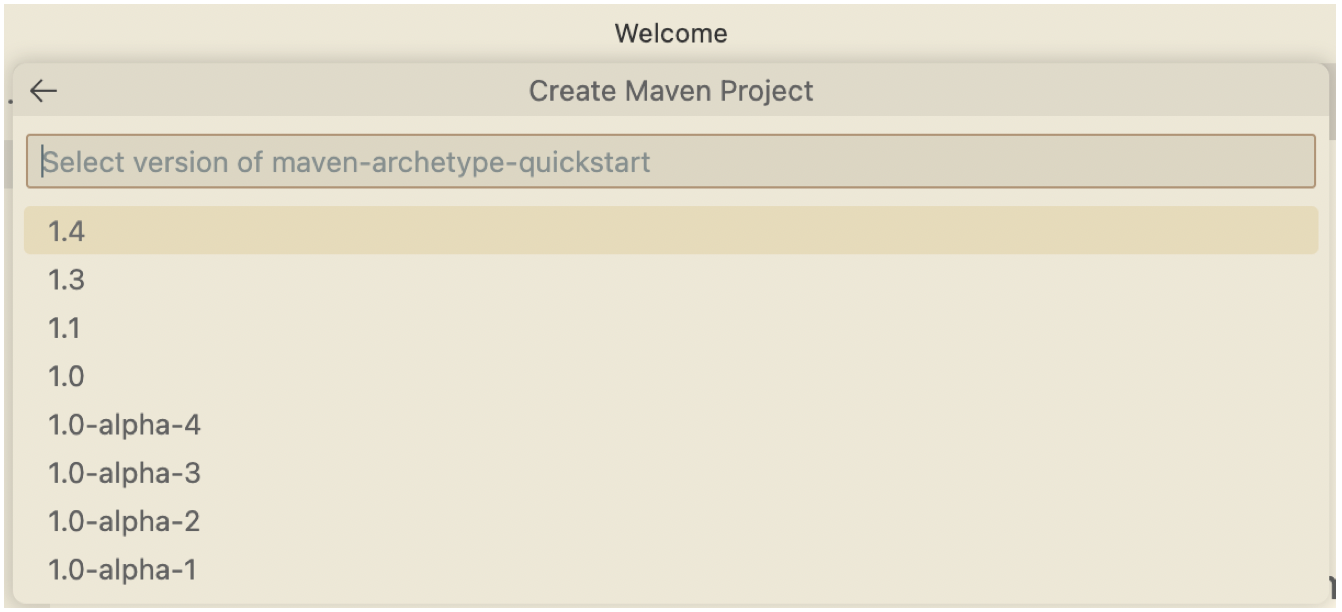
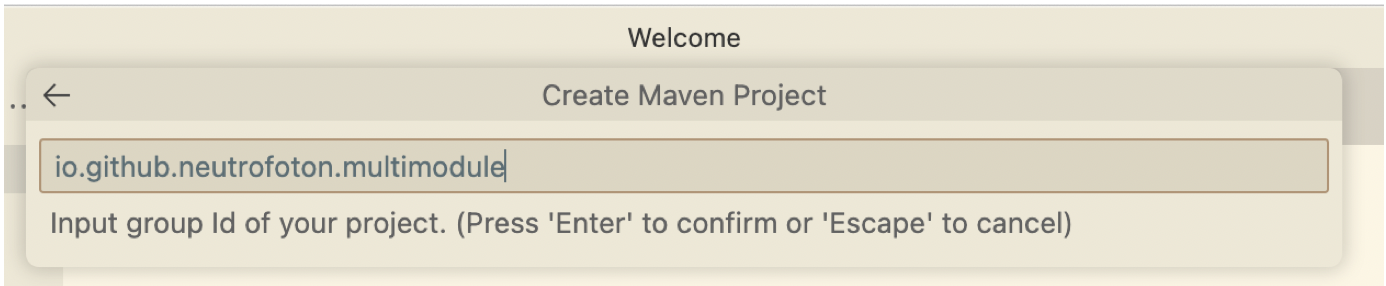
Fill out the maven project setting.
-
VSCode will generate a java project for you.
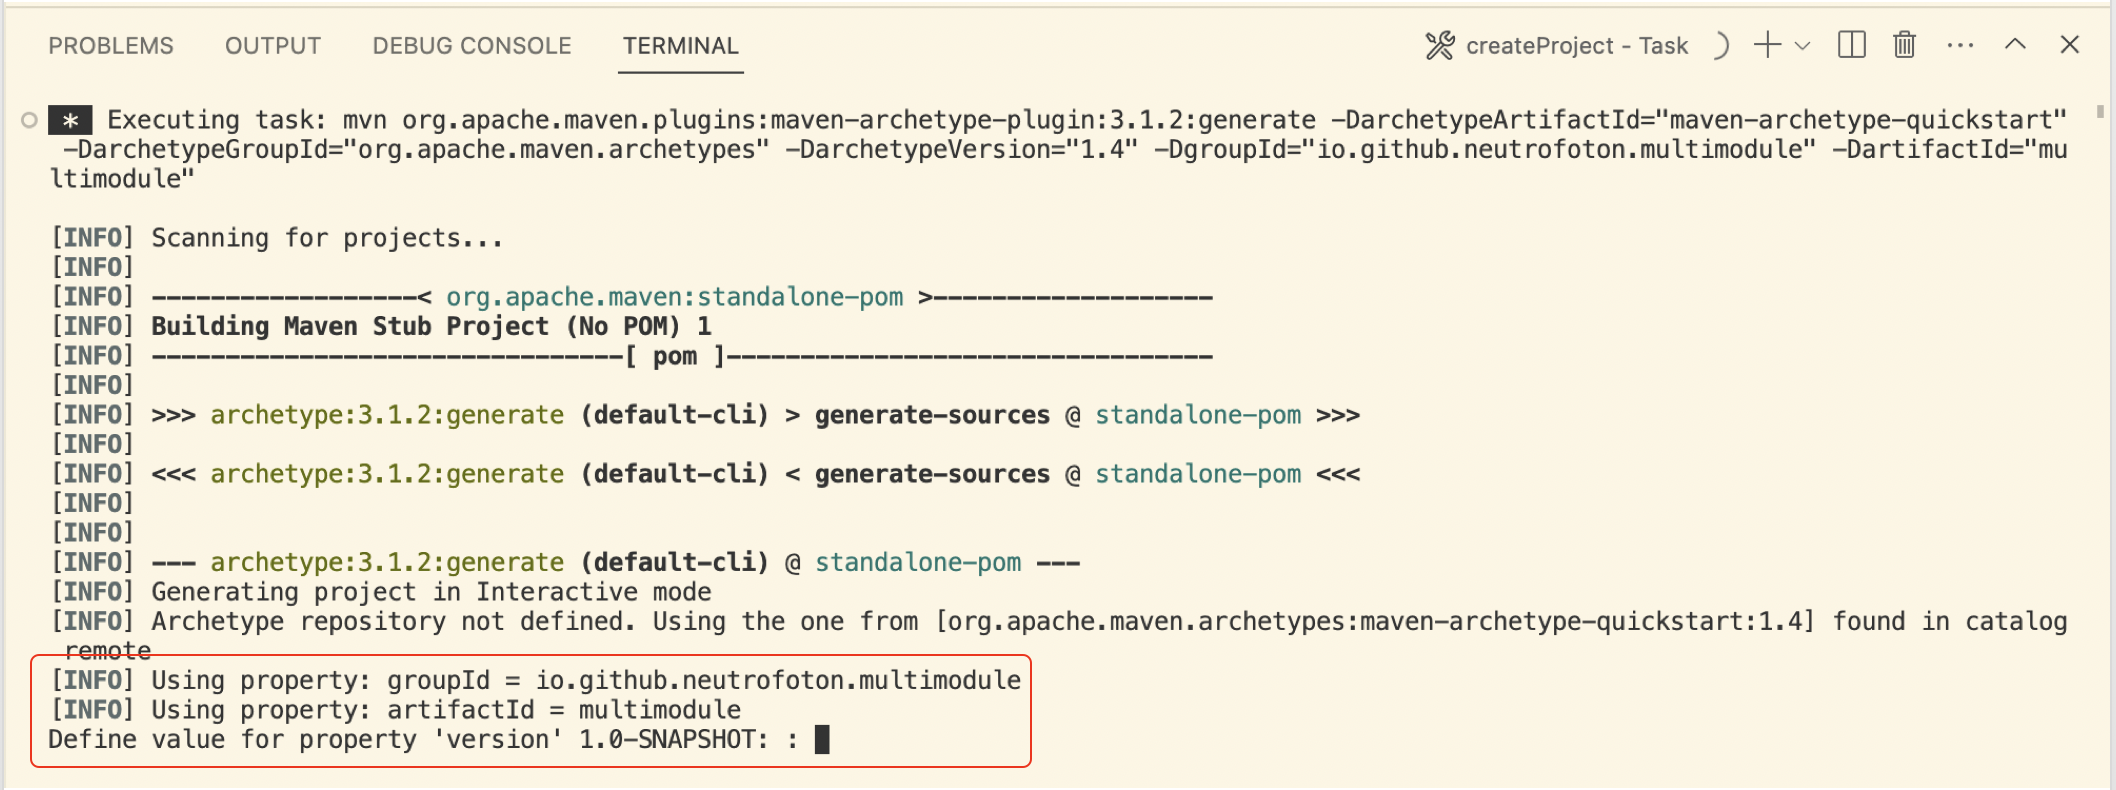
While generating the Java project, we will be asked for the version. If we agree with default version 1.0-SNAPSHOT, we just need to press Enter. Then follow the next question in the terminal tab.
-
Finally the Java project generated and displayed in the File explorer of VSCode.

Setup Maven Multi Modules Projects
To setup the previous Maven project as Maven Multi Modules projects, let’s do the following steps.
-
Delete the src and target folder and their contents on the provious project. Then Edit the root pom.xml as below.
<?xml version="1.0" encoding="UTF-8" standalone="no"?>
<project xmlns="http://maven.apache.org/POM/4.0.0" xmlns:xsi="http://www.w3.org/2001/XMLSchema-instance" xsi:schemaLocation="http://maven.apache.org/POM/4.0.0 http://maven.apache.org/xsd/maven-4.0.0.xsd">


<modelVersion>4.0.0</modelVersion>
<groupId>io.github.neutrofoton.multimodule</groupId>
<artifactId>multimodule</artifactId>
<version>1.0-SNAPSHOT</version>
<packaging>pom</packaging>

</project>
-
Run maven install to ensure the pom.xml is valid.

-
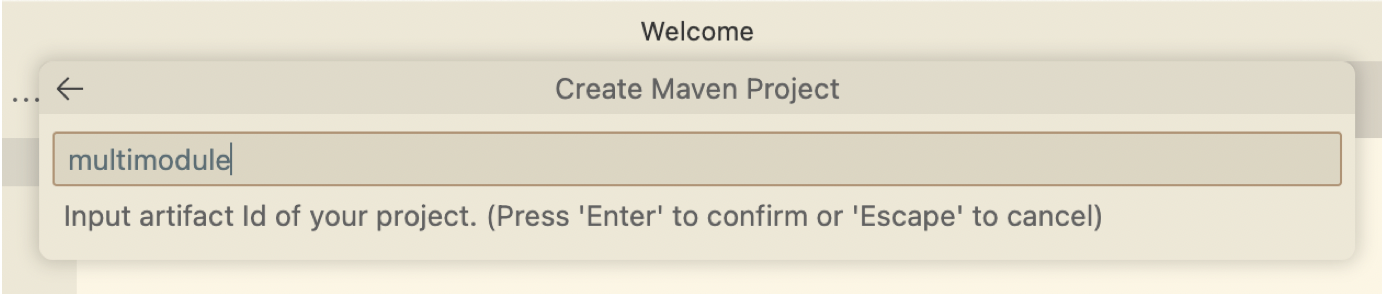
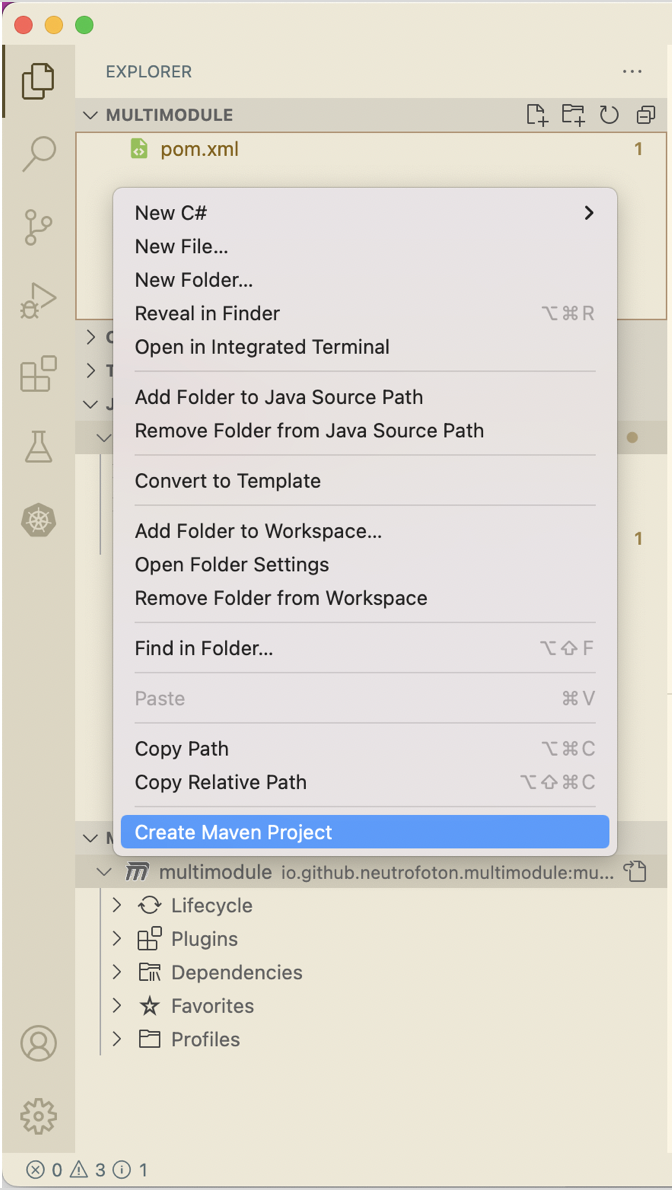
If no error on step #2, then add a new maven project as a new maven module. To do that, right click on the VSCode Explorer > select Create Maven Project.
-
Fill out the group and artifact as we did previously.
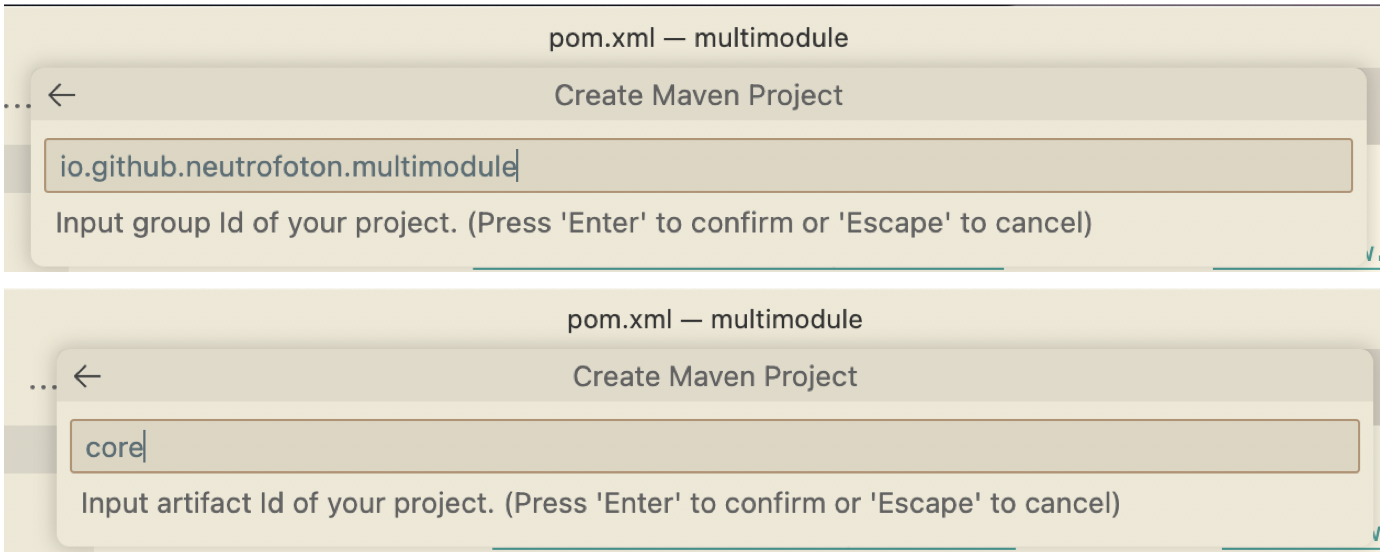
We use the sama group id as parent/root pom.xml. But a new name for artifact, in this case we named it core module.
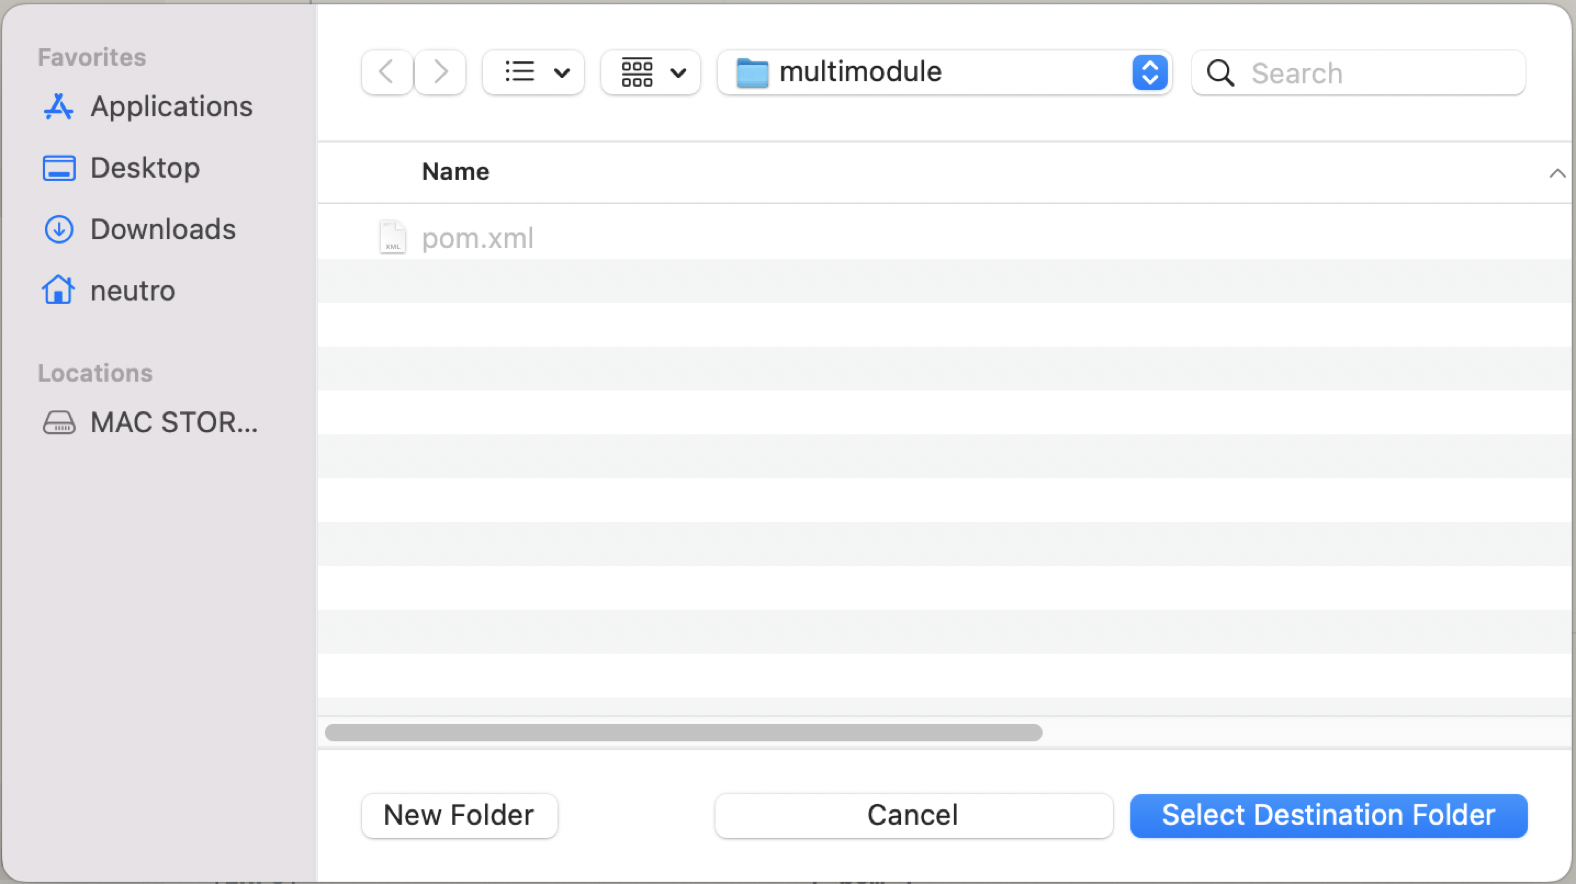
-
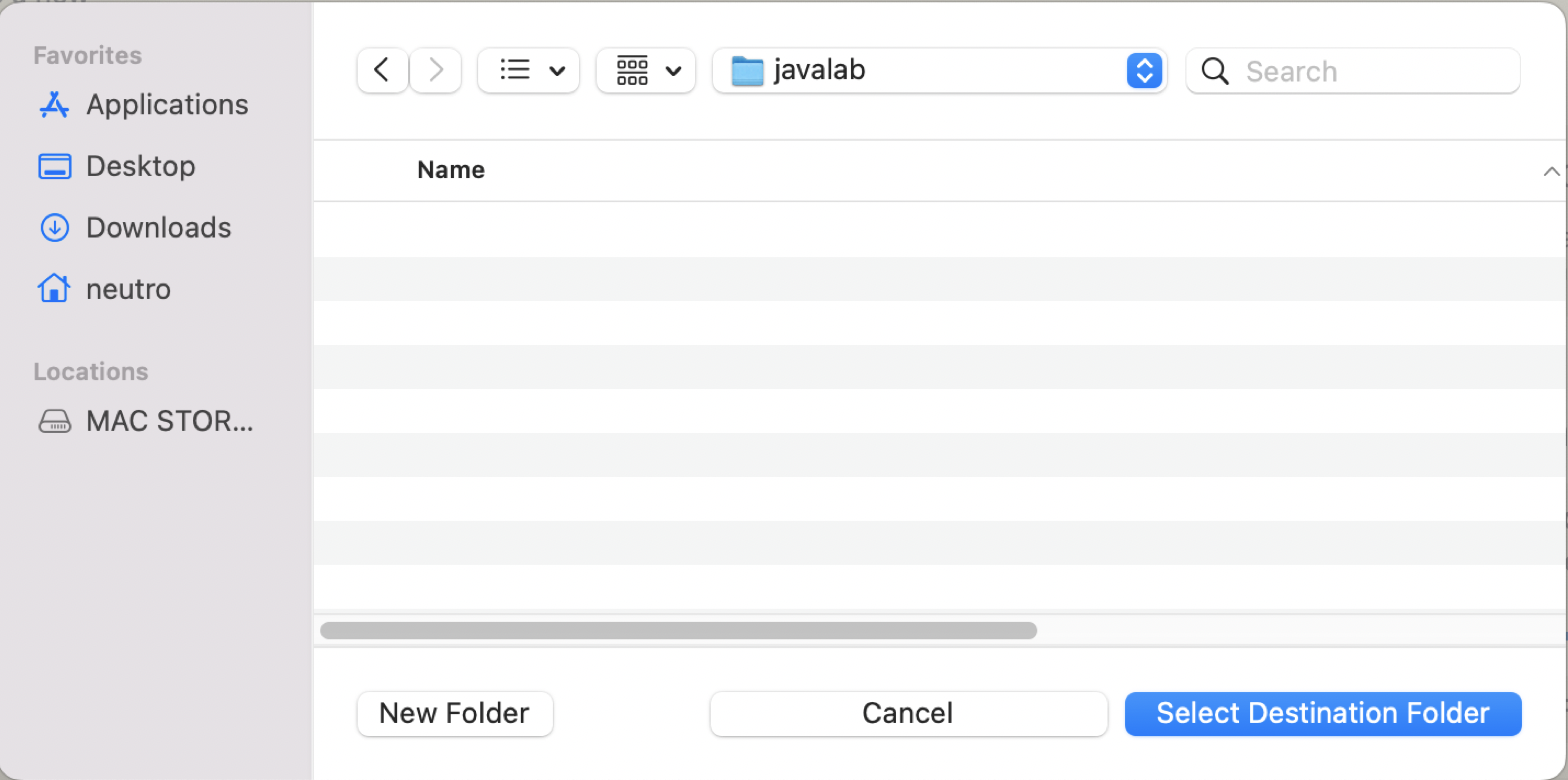
Select the destionation folder of the module iside the root/parent project.
-
Create another module called app by repeating step #3 to #5.
-
The pom.xml should be updated as follow.
<?xml version="1.0" encoding="UTF-8" standalone="no"?>
<project xmlns="http://maven.apache.org/POM/4.0.0" xmlns:xsi="http://www.w3.org/2001/XMLSchema-instance" xsi:schemaLocation="http://maven.apache.org/POM/4.0.0 http://maven.apache.org/xsd/maven-4.0.0.xsd">

<modelVersion>4.0.0</modelVersion>
<groupId>io.github.neutrofoton.multimodule</groupId>
<artifactId>multimodule</artifactId>
<version>1.0-SNAPSHOT</version>

<packaging>pom</packaging>

<modules>
   <module>core</module>
   <module>app</module>
</modules>

</project>
And the project structure should be like this
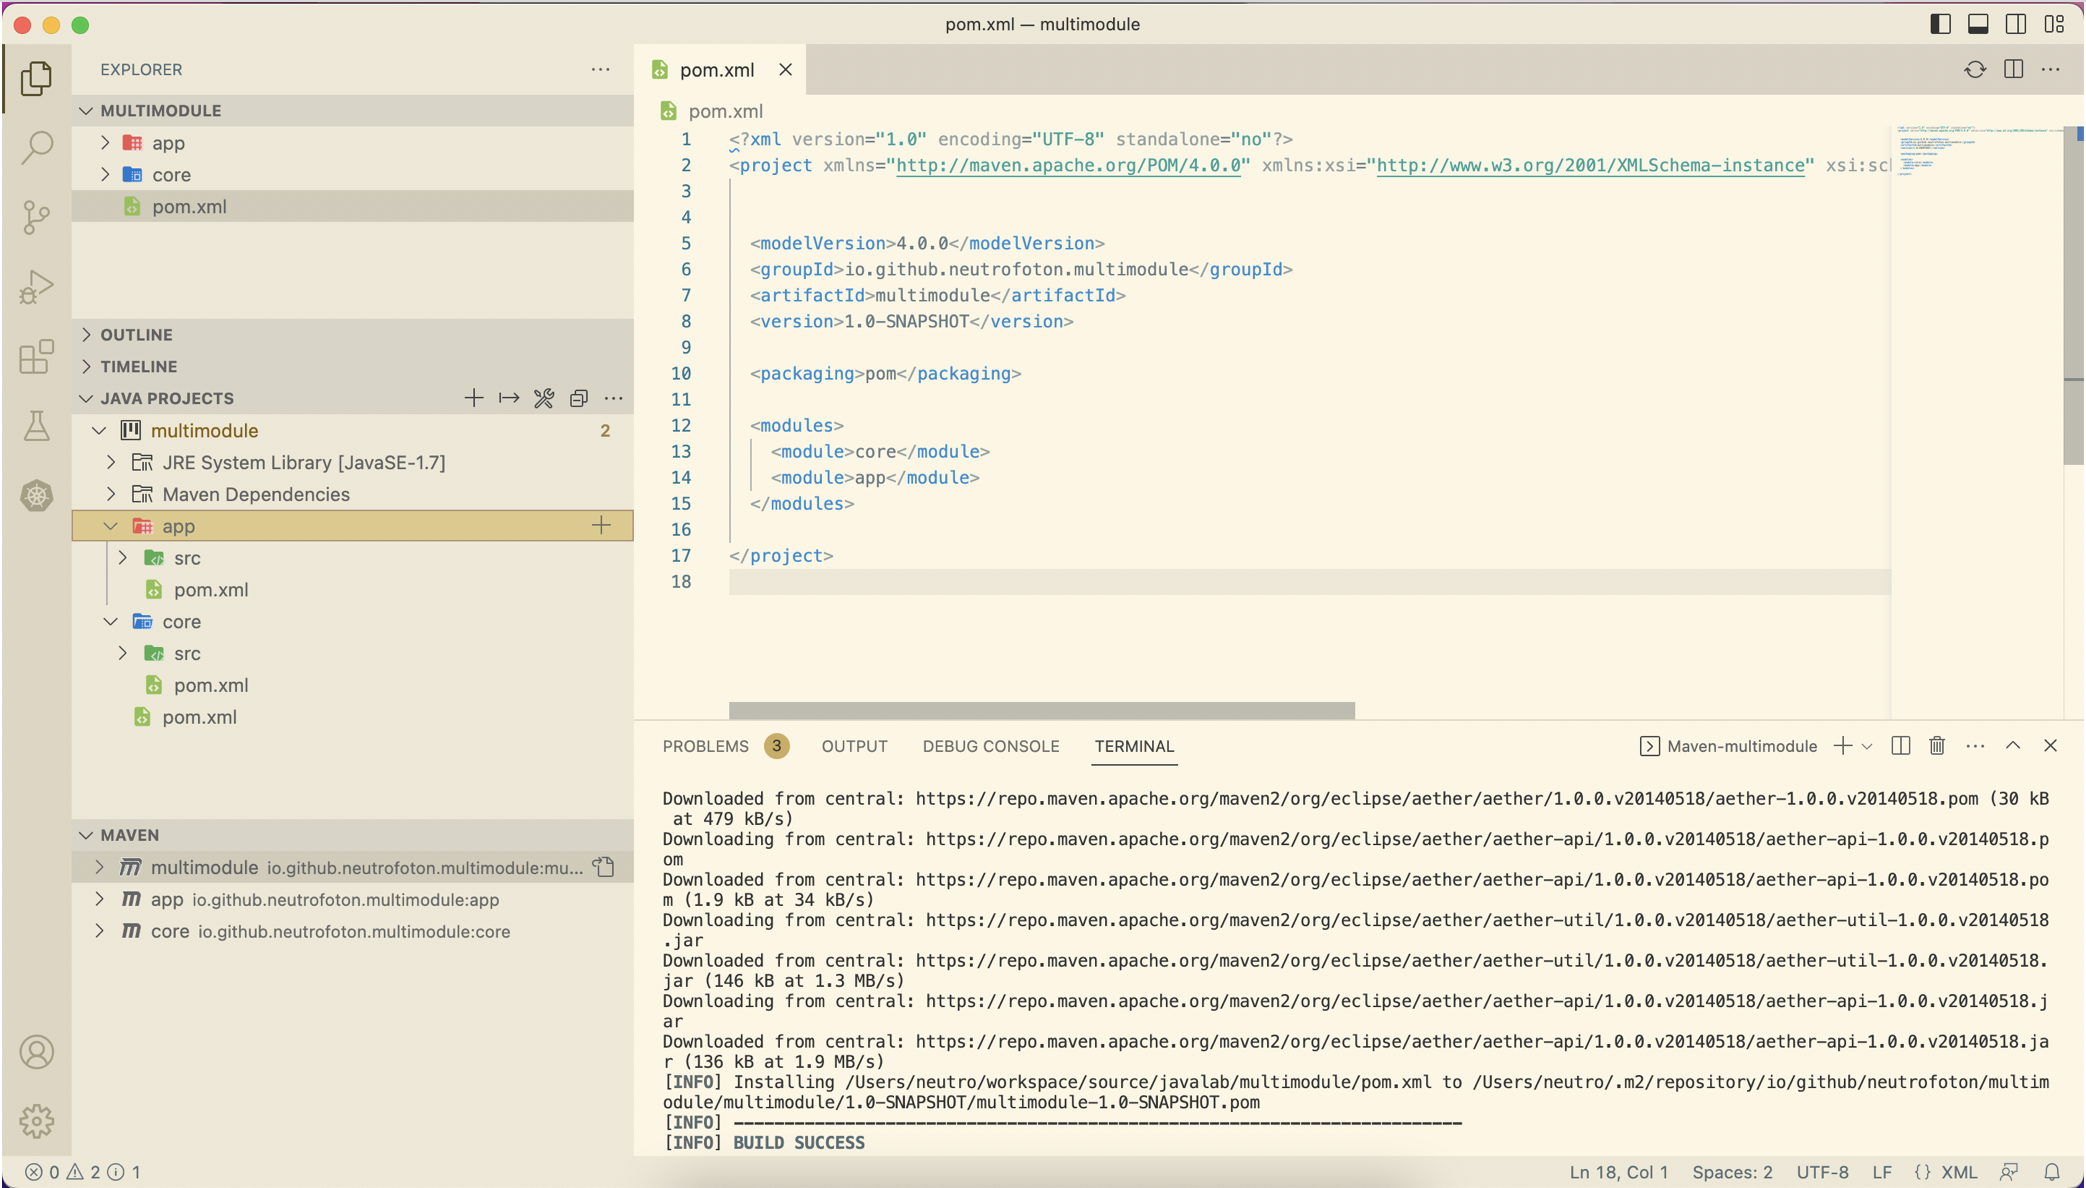
-
To ensure the project well defined, we can run maven install on the root pom.xml
Tips
To clear the plugin cache of the Java plugin, we can run
(MacOS) : CMD + Shift + P then type Java: Clean Java language Server Workspace
24 Apr 2023
•
kubernetes
Namespace basically is grouping resource in cluster. Namespace-based scoping is applicable only for namespaced objects (e.g. Deployments, Services, etc) and not for cluster-wide objects (e.g. StorageClass, Nodes, PersistentVolumes, etc).
Resources can communicate each other even on different namespace. To create a namespace can be done with the following yaml.
Creating namespace
apiVersion: v1
kind: Namespace
metadata:
  name: billing
# viewing namespaces
kubectl get namespace
kubectl get ns
Creating Pod inside a namespace
To create a Pod (example nginx.yaml) inside a namespace:
kubectl apply -f nginx.yaml --namespace billing
We can also add namespace information in the nginx.yam
apiVersion: v1
kind: Pod
metadata:
  name: nginx
  namespace: billing
  labels:
    name: nginx
spec:
  containers:
  - name: nginx
    image: nginx
kubectl get all --namespace=billing
Deleting namespace
# delete namespace
kubectl delete namespace {NAME_OF_NAMESPACE}
kubectl delete ns {NAME_OF_NAMESPACE}
Deleting a namespace will delete all the resource inside it.
23 Apr 2023
•
kubernetes
Persistence with MongoDB
Previous microservices example has no data persistence. In this sectio we will add MongoDB as data persistence which stores historical position of trucks.
MongoDB Microservice
We will deploy MongoDB with the following specification.
apiVersion: apps/v1
kind: Deployment
metadata:
  name: mongodb
spec:
  selector:
    matchLabels:
      app: mongodb
  replicas: 1
  template: # template for the pods
    metadata:
      labels:
        app: mongodb
    spec:
      containers:
      - name: mongodb
        image: mongo:3.6.5-jessie

---
kind: Service
apiVersion: v1
metadata:
  name: fleetman-mongodb
spec:
  selector:
    app: mongodb
  ports:
    - name: mongoport
      port: 27017
  type: ClusterIP
Updating Container Images
In this lab we will use example provided by of DickChesterwood. In the position tracker API, we can see the MongoDB configuration in the application-production-microservice.properties. The address of MongoDB is fully qualified domain name **fleetman-mongodb**.default.svc.cluster.local
spring.activemq.broker-url=tcp://fleetman-queue.default.svc.cluster.local:61616
fleetman.position.queue=positionQueue

# We'll use the default port 8080 for all microservices in production cluster.

# TODO but this is reasonable guess! This may change when we scale it out...
spring.data.mongodb.host=fleetman-mongodb.default.svc.cluster.local
Before demonstrating the persistence with MongoDB, we will update several images used in previous section and apply them in Kubernetes cluster.
List of updated pod image
| Pod |
Image |
| Queue (ActiveMQ) |
richardchesterwood/k8s-fleetman-queue:release2 |
| Position Tracker |
richardchesterwood/k8s-fleetman-position-tracker:release3 |
| Position Simulator |
richardchesterwood/k8s-fleetman-position-simulator:release2 |
| API Gateway |
richardchesterwood/k8s-fleetman-api-gateway:release2 |
| WebApp |
richardchesterwood/k8s-fleetman-webapp-angular:release2 |
Storing MongoDB Database Outside Container (Host)
Volumes
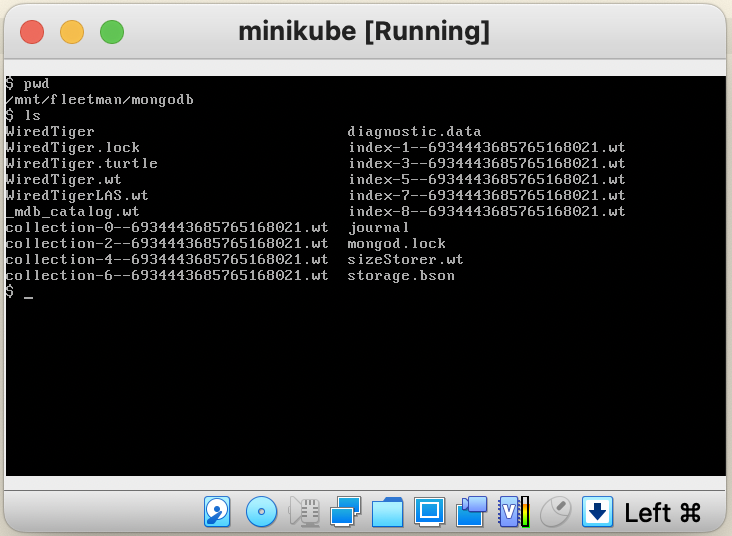
Volumes allows us to store data outside a pod. In the following example we will store data at the host of node.
Thus, when the Pod crashes, the data will not lost.
apiVersion: apps/v1
kind: Deployment
metadata:
  name: mongodb
spec:
  selector:
    matchLabels:
      app: mongodb
  replicas: 1
  template: # template for the pods
    metadata:
      labels:
        app: mongodb
    spec:
      containers:
      - name: mongodb
        image: mongo:3.6.5-jessie
        volumeMounts:
          - name: mongo-persistent-storage
            mountPath: /data/db # MongoDB store data inside the container
      volumes:
        - name: mongo-persistent-storage
          # This AWS EBS volume must already exist.
          #awsElasticBlockStore:
          #....

          # This is Azure data storage
          #azureDisk
          #.....

          # This is local disk of node (host)
          hostPath:
             path: /mnt/fleetman/mongodb
             type: DirectoryOrCreate
---
kind: Service
apiVersion: v1
metadata:
  name: fleetman-mongodb
spec:
  selector:
    app: mongodb
  ports:
    - name: mongoport
      port: 27017
  type: ClusterIP
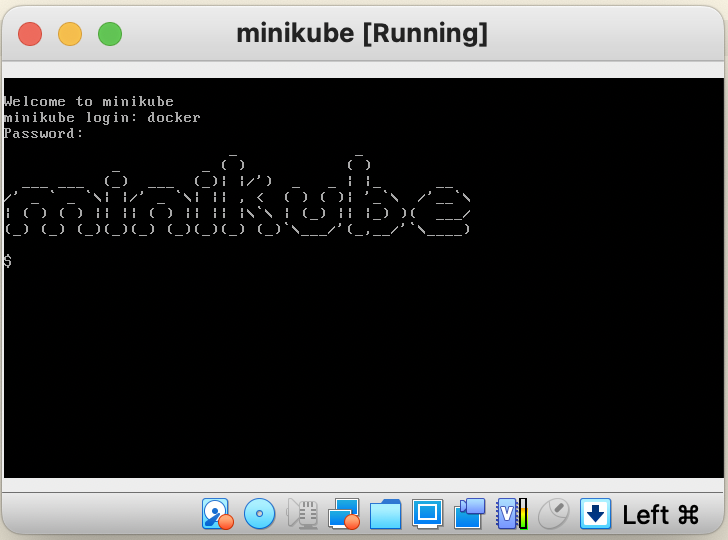
Open VirtualBox, the double clik minikube VM which is currently running. It will pop up a windows and prompt login to minikube.
We can login to the minikube host using
username : docker
password : tcuser
PersistentVolume
To make persistent configuration of Pod more clean, we can separated the volume persistent configuration outside the Pod configuration. The Pod just refers to the peristent volume configuration. Our pod yaml does not have to be changed when we move from one cloud provider to another. We just change the persistent config which is referenced by the Pod. Ideally it cound be in separated yaml file.
A PersistentVolume (PV) is a piece of storage in the cluster that has been provisioned by an administrator or dynamically provisioned using Storage Classes. It is a resource in the cluster just like a node is a cluster resource. PVs are volume plugins like Volumes, but have a lifecycle independent of any individual Pod that uses the PV. This API object captures the details of the implementation of the storage, be that NFS, iSCSI, or a cloud-provider-specific storage system.
Let’s modified the Mongo Pod definition using the PersistentVolume.
apiVersion: apps/v1
kind: Deployment
metadata:
  name: mongodb
spec:
  selector:
    matchLabels:
      app: mongodb
  replicas: 1
  template: # template for the pods
    metadata:
      labels:
        app: mongodb
    spec:
      containers:
      - name: mongodb
        image: mongo:3.6.5-jessie
        volumeMounts:
          - name: mongo-persistent-storage
            mountPath: /data/db # MongoDB store data inside the container
      volumes:
        - name: mongo-persistent-storage
          # pointer to the configuration of HOW we want the mount to be implemented
          persistentVolumeClaim:
            claimName: mongo-pvc
---
kind: Service
apiVersion: v1
metadata:
  name: fleetman-mongodb
spec:
  selector:
    app: mongodb
  ports:
    - name: mongoport
      port: 27017
  type: ClusterIP
So the general point of this, the mongodb Pod does not have specific implementation detail. The detail definition of the storage is put outside Pod definition.
In this lab, we use local storage to store mongodb database. To define the specific detail of storage we need to define PersistentVolumeClaim definition. We do that with the following storage.yaml
# Storage specification that's expected
apiVersion: v1
kind: PersistentVolumeClaim
metadata:
  name: mongo-pvc
spec:
  storageClassName: mylocalstorage
  accessModes:
    - ReadWriteOnce
  resources:
    requests:
      storage: 20Gi
---
# storage that will be created to fullfil the storage expectation
apiVersion: v1
kind: PersistentVolume
metadata:
  name: local-storage
spec:
  storageClassName: mylocalstorage
  capacity:
    storage: 20Gi
  accessModes:
    - ReadWriteOnce
  hostPath:
    path: "/mnt/fleetman-new/mongodb"
    type: DirectoryOrCreate
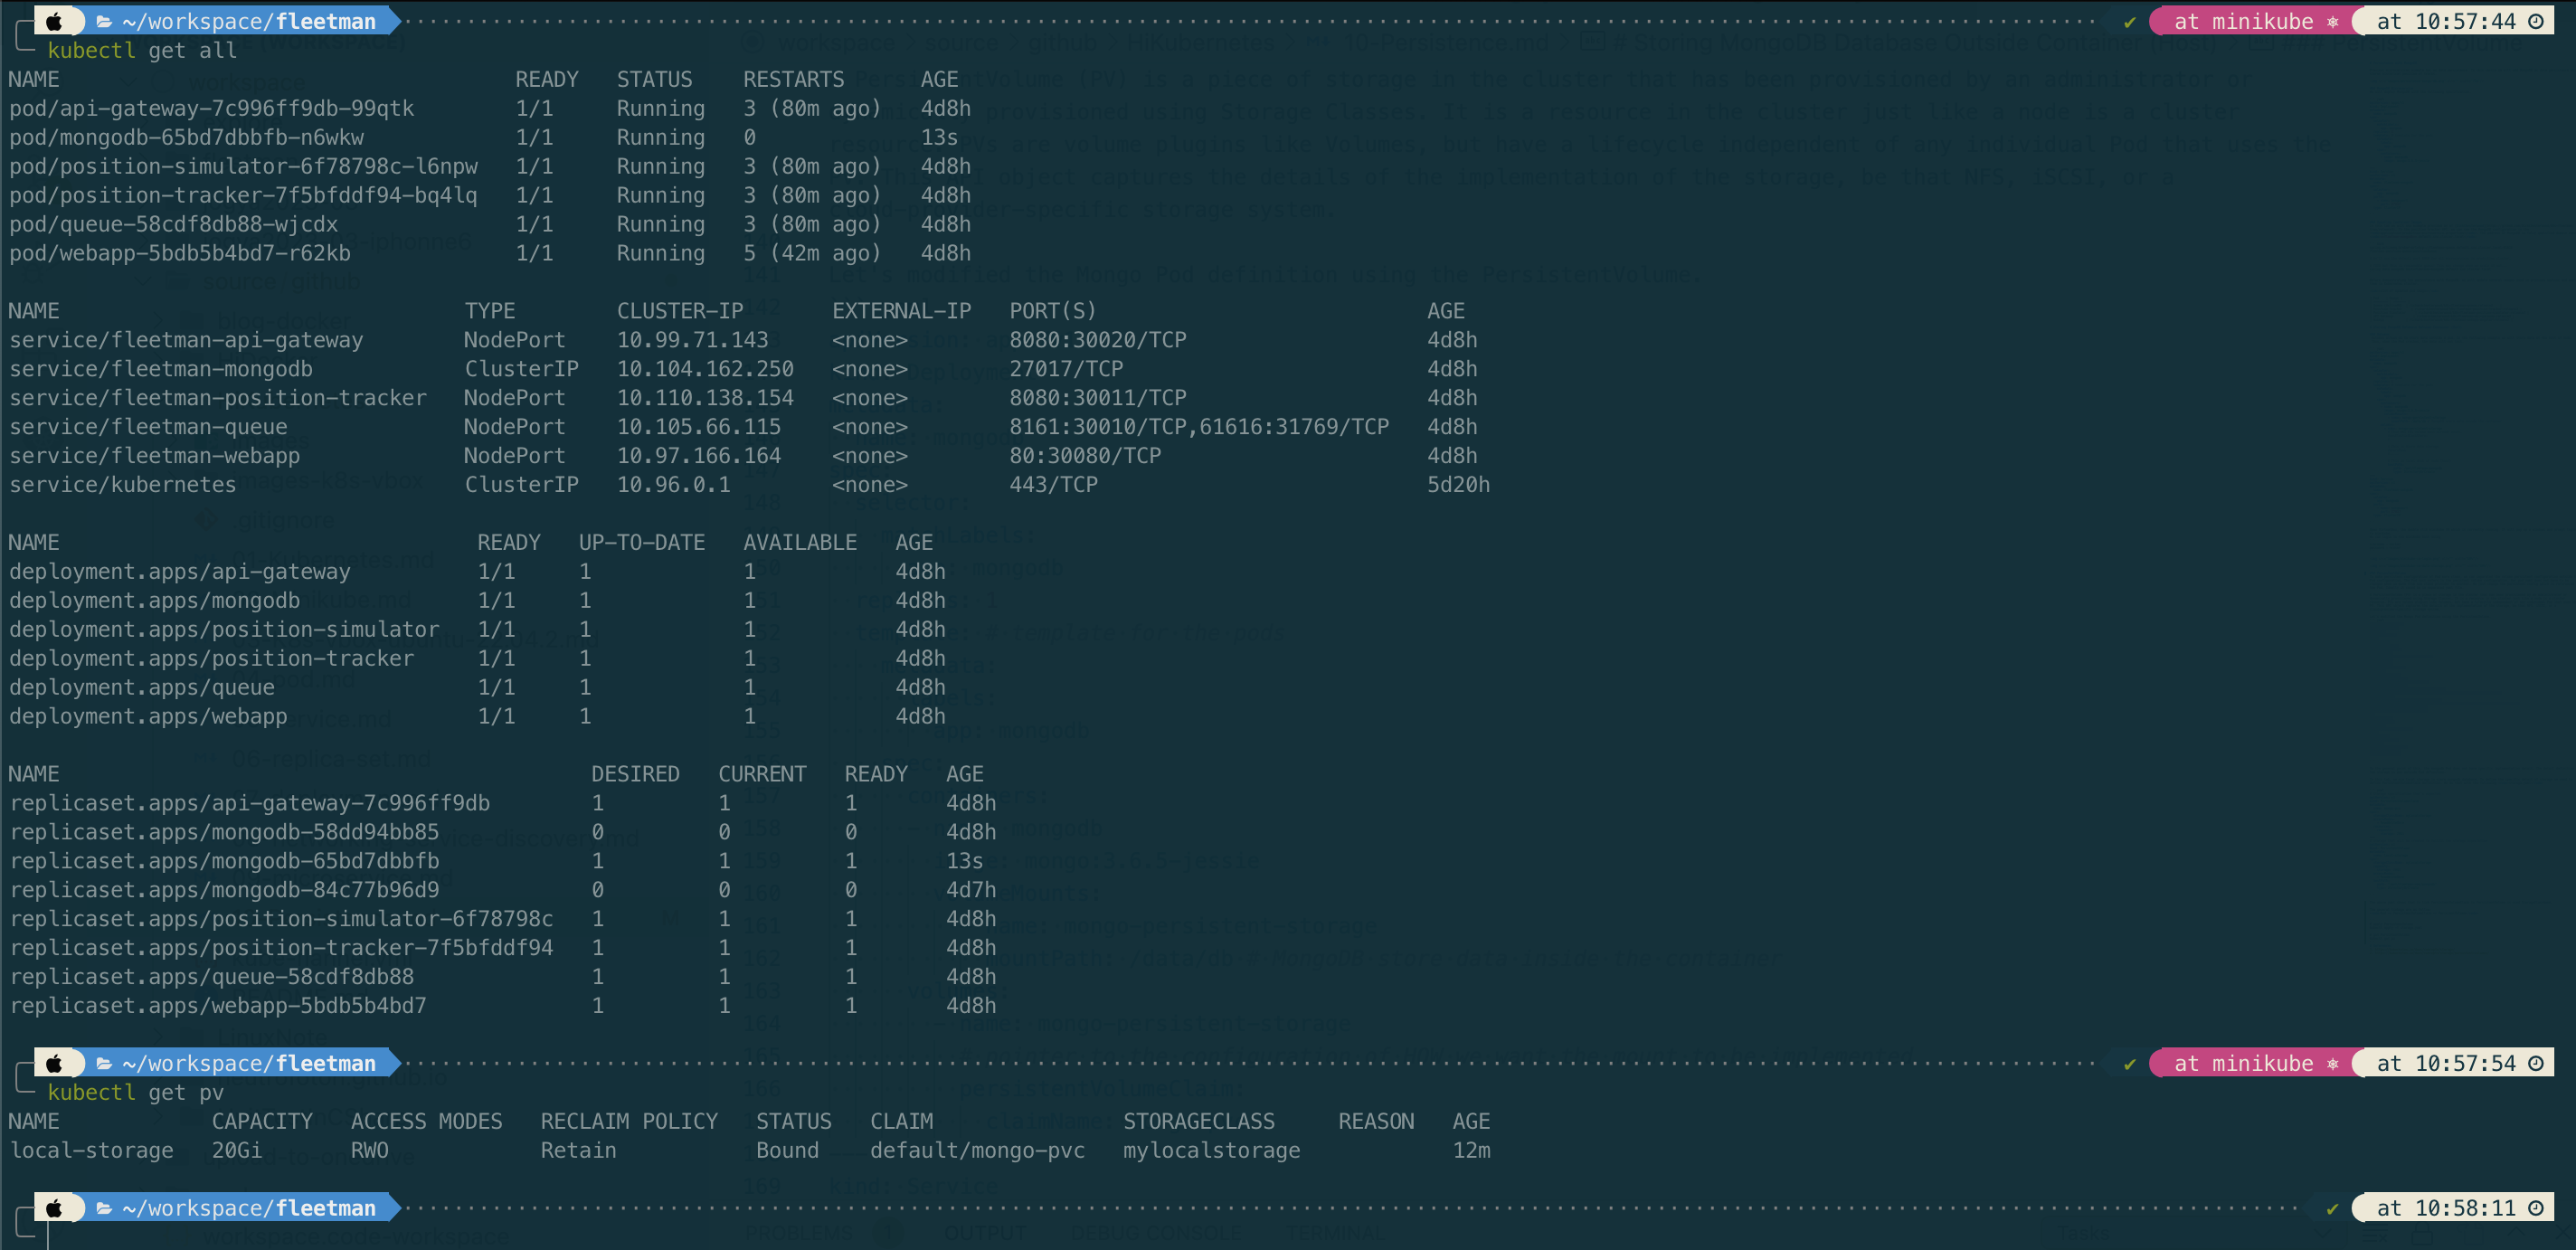
The above yaml shows that to link PersistentVolumeClaim to PersistentVolume is used StorageClassName.
The general linkage are as follow:
Pod -> PersistentVolumeClaim -> PeristentVolume
# apply PersistentVolume
kubectl apply -f storage.yaml

# get PersistentVolume
kubectl get pv
References
- https://kubernetes.io/docs/concepts/storage/
- https://kubernetes.io/docs/concepts/storage/persistent-volumes/
22 Apr 2023
•
kubernetes
Microservice
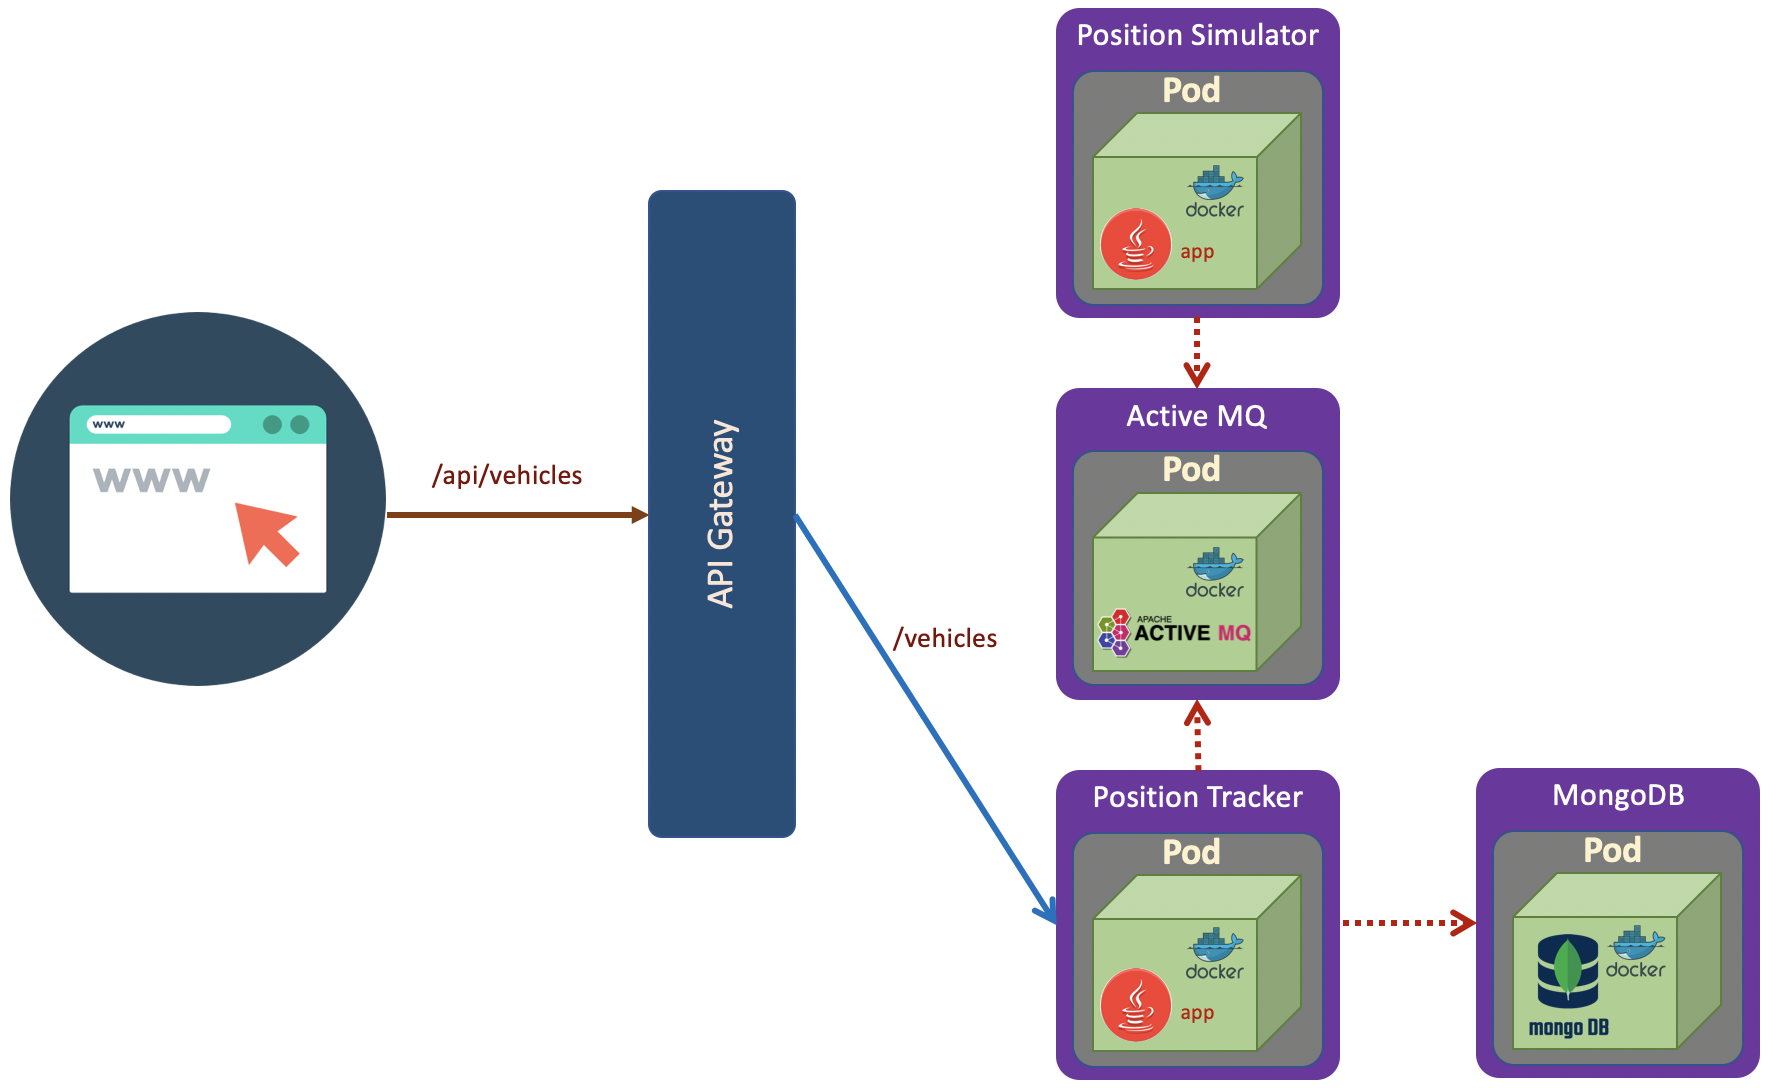
In this lab, we will use example provided by DickyChesterwood. The docker images are available on Docker Hub
 The scenario as shown in the above diagram. The deployment steps are:
1. Queue (ActiveMQ)
First of all we will create active-mq.yaml
# ActiveMQ Deployment
apiVersion: apps/v1
kind: Deployment
metadata:
  name: queue
spec:
  selector:
    matchLabels:
      app: queue
  replicas: 1
  template:
    metadata:
      labels:
        app: queue
    spec:
      containers:
      - name: queue
        image: richardchesterwood/k8s-fleetman-queue:release1

---
# ActiveMQ Service
apiVersion: v1
kind: Service
metadata:
  name: fleetman-queue

spec:
  # This defines which pods are going to be represented by this Service
  # The service becomes a network endpoint for either other services
  # or maybe external users to connect to (eg browser)
  selector:
    app: queue

  ports:
    - name: http
      port: 8161
      nodePort: 30010

    - name: endpoint
      port: 61616

  type: NodePort
kubectl apply -f active-mq.yaml
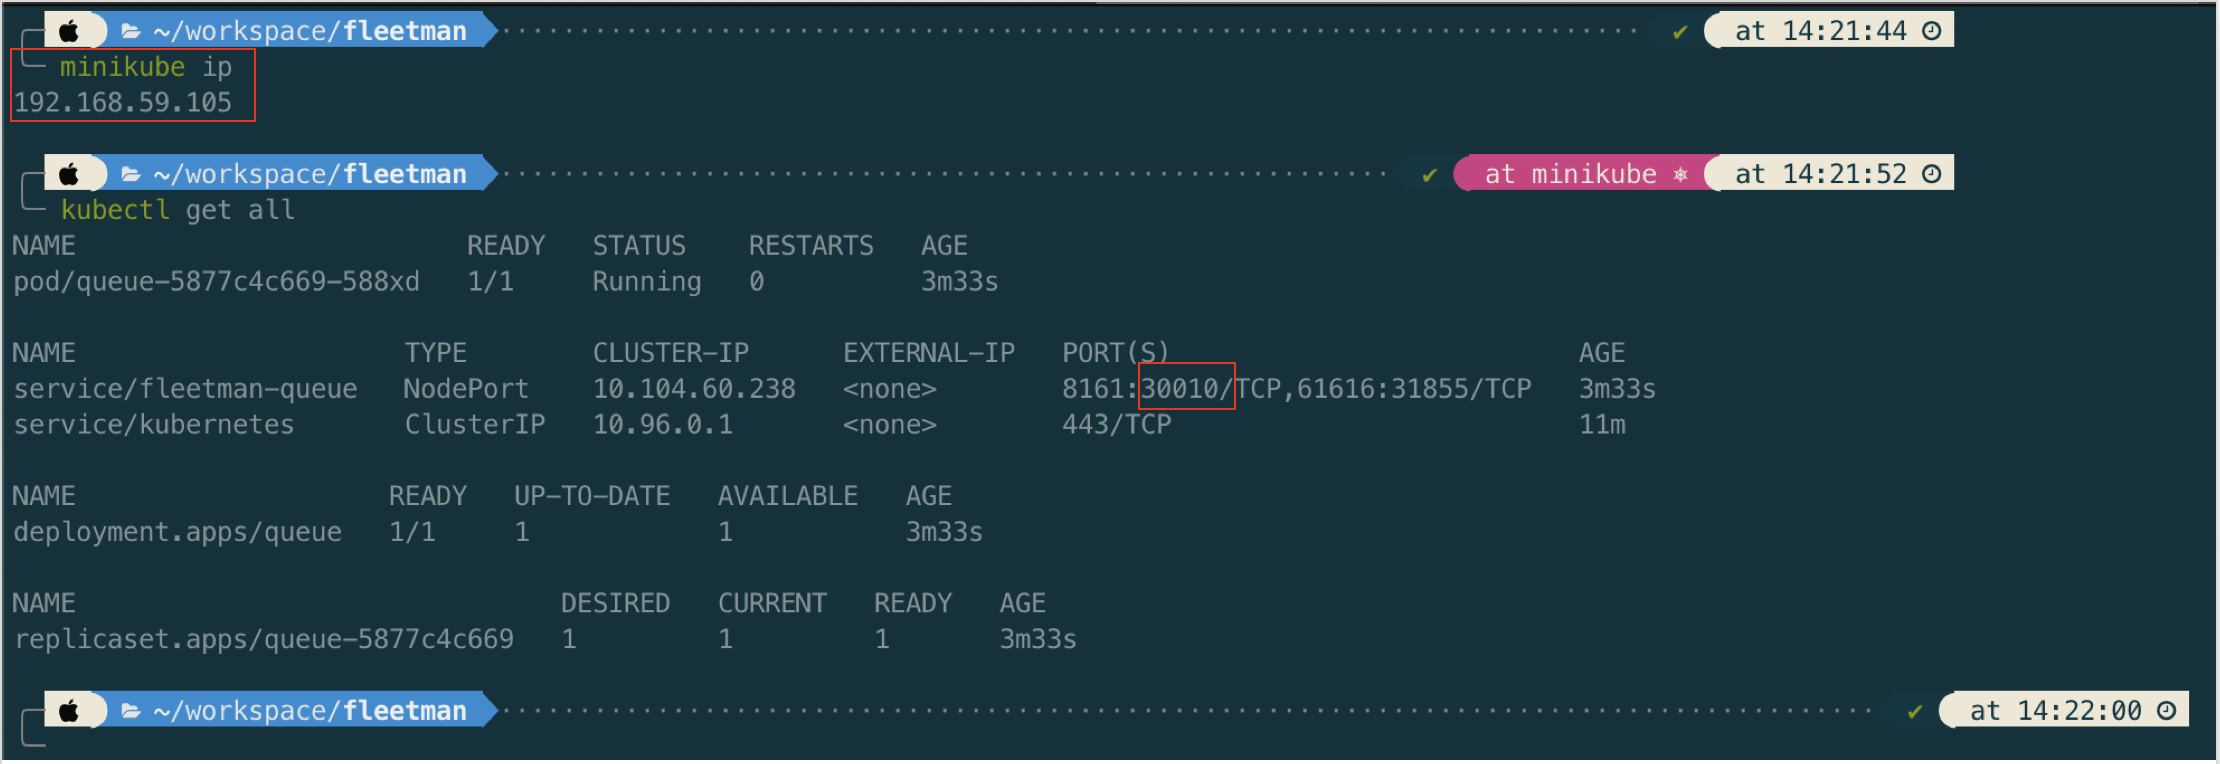
Now open in browser http://192.168.59.105:30010/
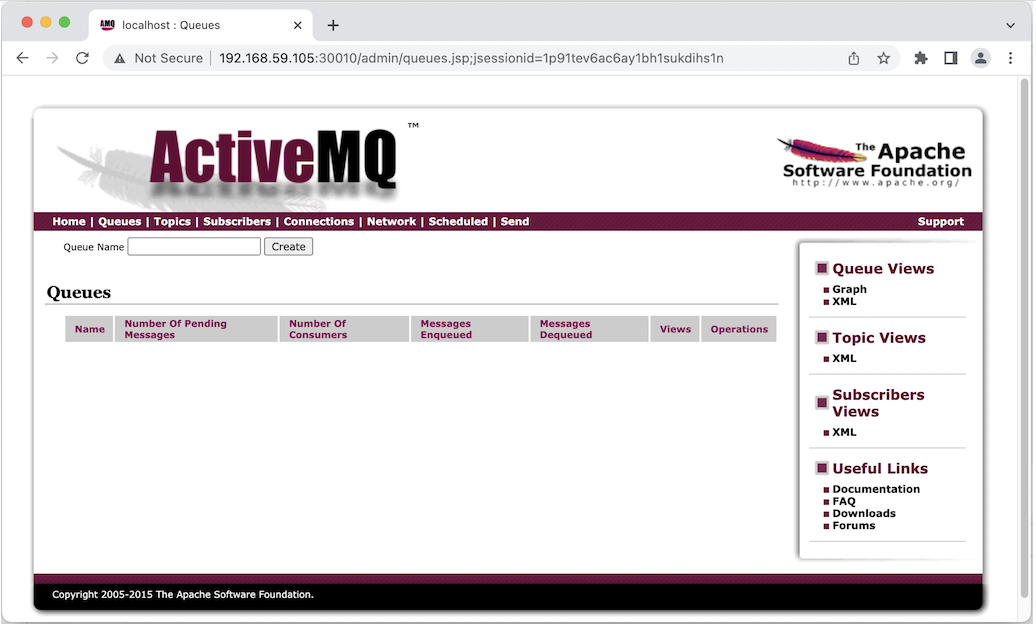
ActiveMQ default username/password is admin/admin
2. Position Tracker
apiVersion: apps/v1
kind: Deployment
metadata:
  name: position-tracker
spec:
  selector:
    matchLabels:
      app: position-tracker
  replicas: 1
  template: # template for the pods
    metadata:
      labels:
        app: position-tracker
    spec:
      containers:
      - name: position-tracker
        image: richardchesterwood/k8s-fleetman-position-tracker:release1
        env:
        - name: SPRING_PROFILES_ACTIVE
          value: production-microservice
---
apiVersion: v1
kind: Service
metadata:
  name: fleetman-position-tracker

spec:
  # This defines which pods are going to be represented by this Service
  # The service becomes a network endpoint for either other services
  # or maybe external users to connect to (eg browser)
  selector:
    app: position-tracker

  ports:
    - name: http
      port: 8080
      nodePort: 30011

  type: NodePort
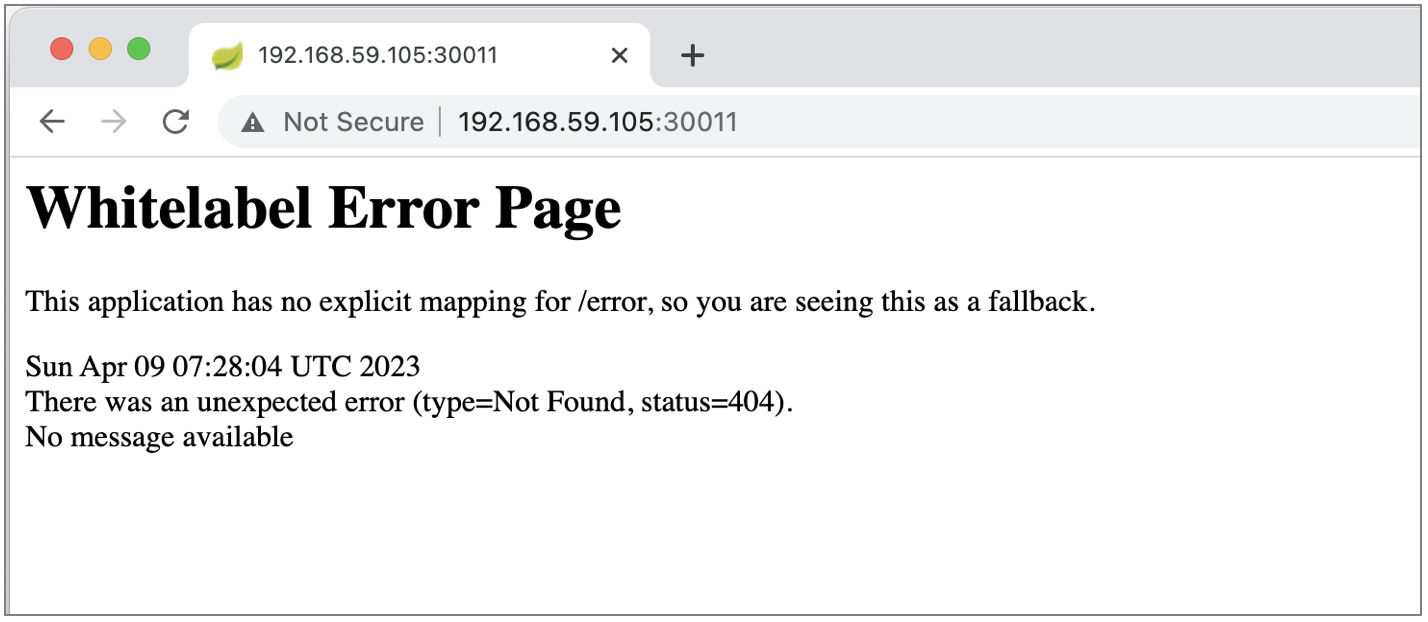
When we hit through browser to http://192.168.59.105:30011/ we get 404 which means that the position tracker service (spring boot app) run well.
For checking purpose we can let the position tracker as NodePort.
For production purpose, we can consider to change the NodePort to ClusterIP since position tracker microservice is not designed to be accessed from ouside cluster.
apiVersion: apps/v1
kind: Deployment
metadata:
  name: position-tracker
spec:
  selector:
    matchLabels:
      app: position-tracker
  replicas: 1
  template: # template for the pods
    metadata:
      labels:
        app: position-tracker
    spec:
      containers:
      - name: position-tracker
        image: richardchesterwood/k8s-fleetman-position-tracker:release1
        env:
        - name: SPRING_PROFILES_ACTIVE
          value: production-microservice
---
apiVersion: v1
kind: Service
metadata:
  name: fleetman-position-tracker

spec:
  # This defines which pods are going to be represented by this Service
  # The service becomes a network endpoint for either other services
  # or maybe external users to connect to (eg browser)
  selector:
    app: position-tracker

  ports:
    - name: http
      port: 8080
      #nodePort: 30011

  #type: NodePort
  type: ClusterIP
3. Position Simulator
In the diagram, the position simulator is not designed to be accessed from outside the cluster. So it should be isolated and no port needed.
# Position Simulator Deployment
apiVersion: apps/v1
kind: Deployment
metadata:
  name: position-simulator
spec:
  selector:
    matchLabels:
      app: position-simulator
  replicas: 1
  template: # template for the pods
    metadata:
      labels:
        app: position-simulator
    spec:
      containers:
      - name: position-simulator
        image: richardchesterwood/k8s-fleetman-position-simulator:release1
        env:
        - name: SPRING_PROFILES_ACTIVE
          value: production-microservice
Save the above yaml as position-simulator.yaml and run apply command.
kubectl apply -f position-simulator.yaml
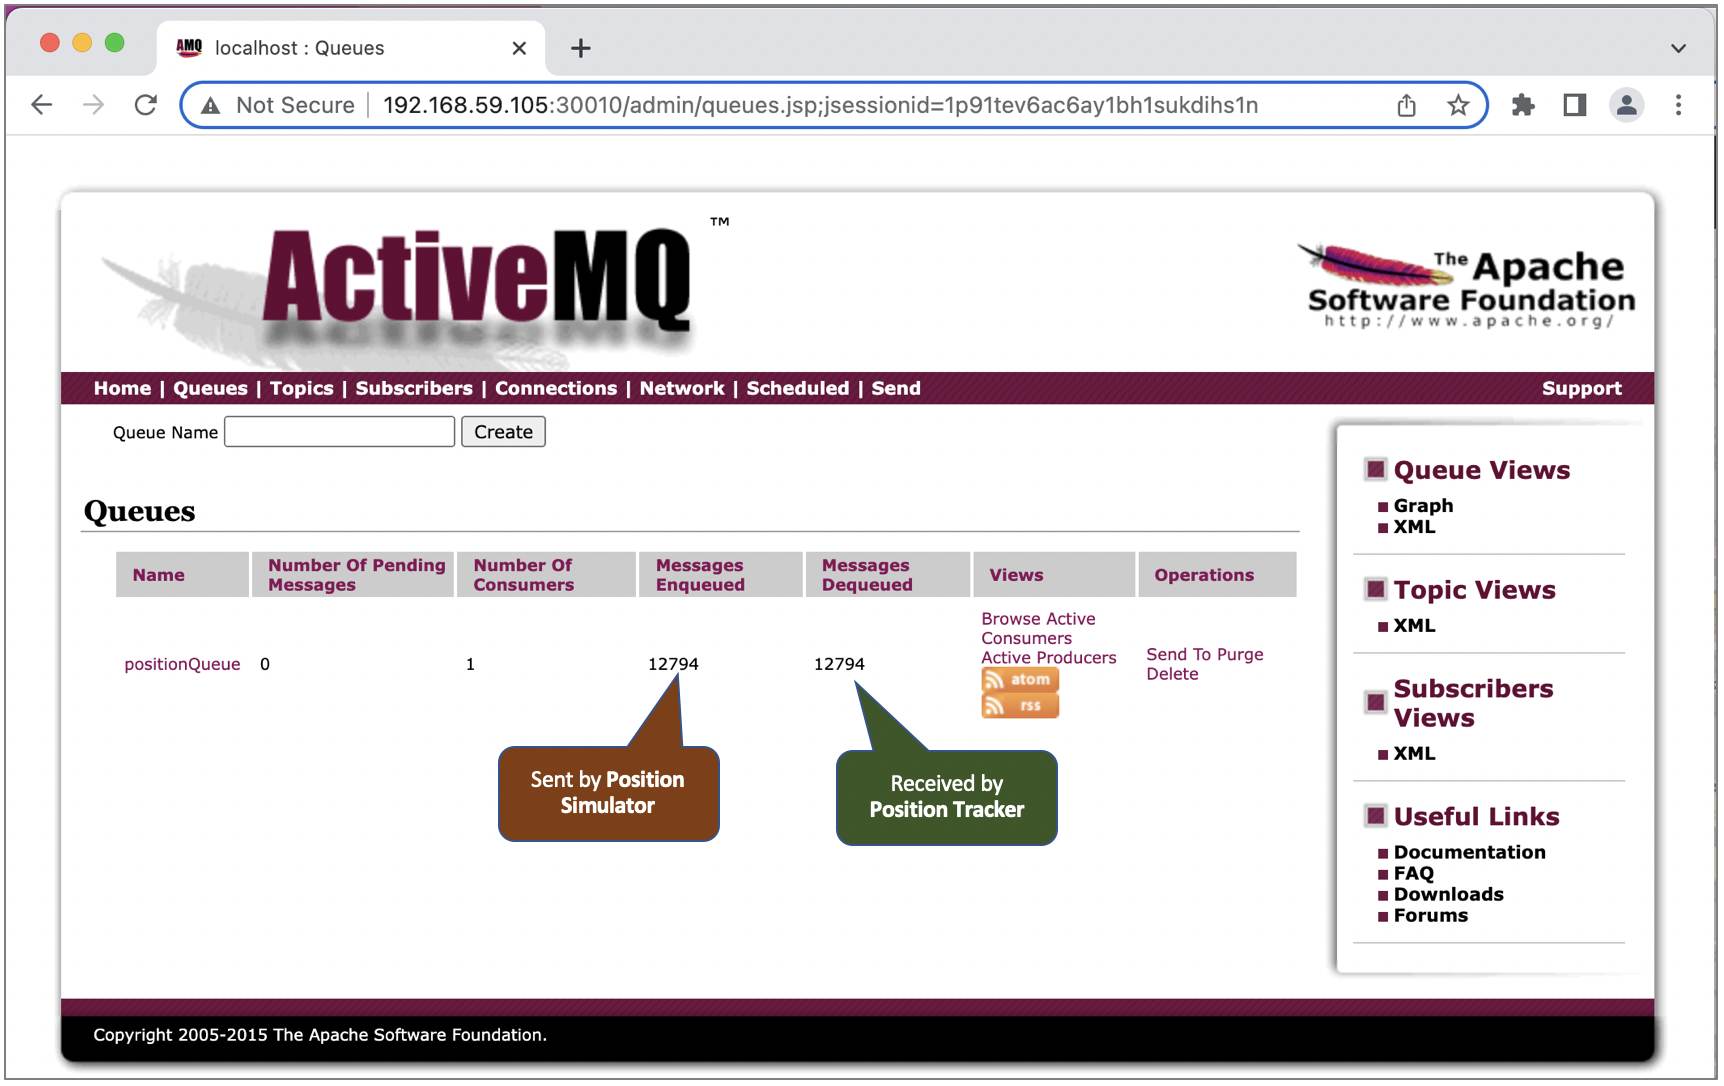
Once the position simulator running, we should see queue record in the ActiveMQ dashboard.
4. API Gateway
apiVersion: apps/v1
kind: Deployment
metadata:
  name: api-gateway
spec:
  selector:
    matchLabels:
      app: api-gateway
  replicas: 1
  template: # template for the pods
    metadata:
      labels:
        app: api-gateway
    spec:
      containers:
      - name: api-gateway
        image: richardchesterwood/k8s-fleetman-api-gateway:release1
        env:
        - name: SPRING_PROFILES_ACTIVE
          value: production-microservice

---
apiVersion: v1
kind: Service
metadata:
  name: fleetman-api-gateway

spec:
  # This defines which pods are going to be represented by this Service
  # The service becomes a network endpoint for either other services
  # or maybe external users to connect to (eg browser)
  selector:
    app: api-gateway

  ports:
    - name: http
      port: 8080
      nodePort: 30020

  type: NodePort
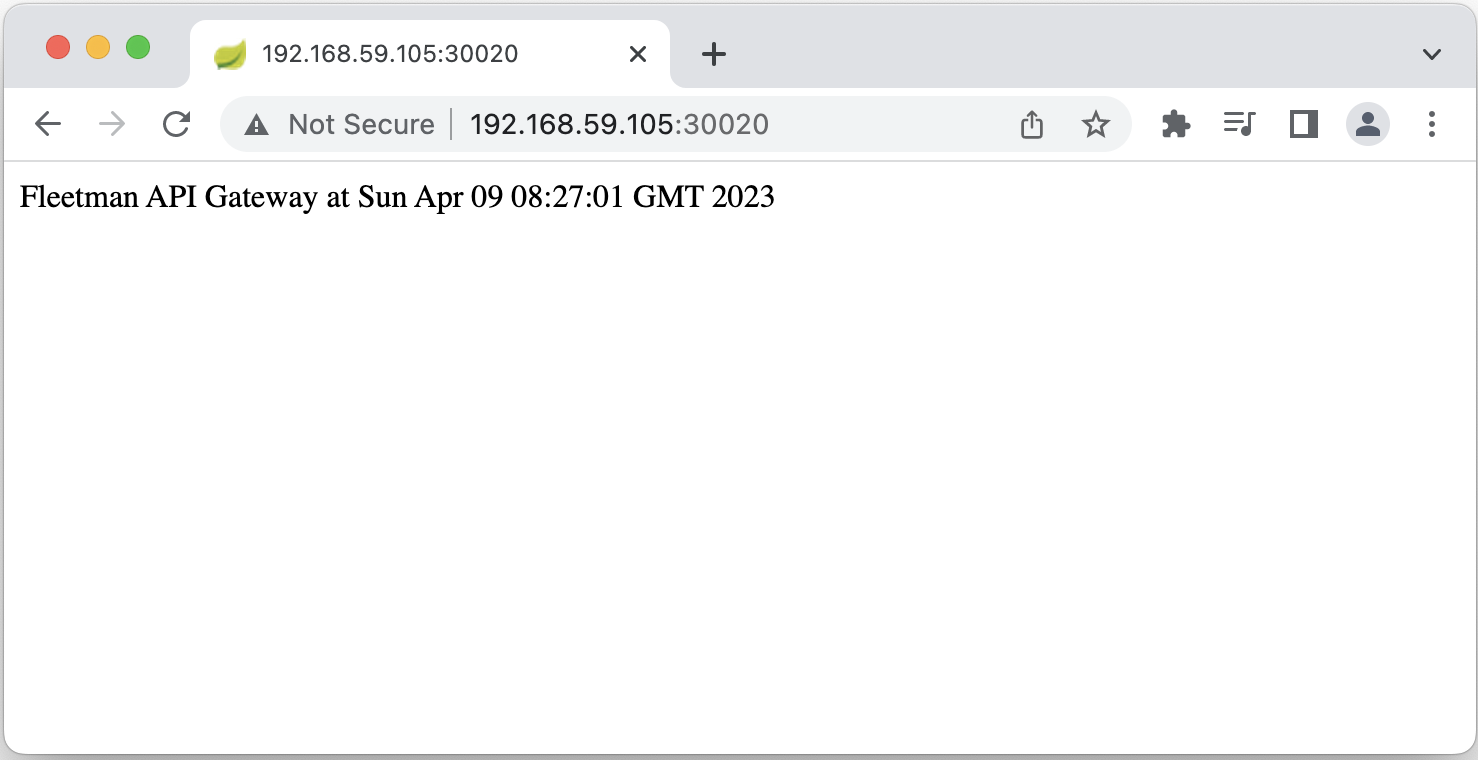
Let’s check the API gateway by open http://192.168.59.105:30020/ in browser.
5. Webapp
apiVersion: apps/v1
kind: Deployment
metadata:
  name: webapp
spec:
  selector:
    matchLabels:
      app: webapp
  replicas: 1
  template: # template for the pods
    metadata:
      labels:
        app: webapp
    spec:
      containers:
      - name: webapp
        image: richardchesterwood/k8s-fleetman-webapp-angular:release1
        env:
        - name: SPRING_PROFILES_ACTIVE
          value: production-microservice

---
apiVersion: v1
kind: Service
metadata:
  name: fleetman-webapp

spec:
  # This defines which pods are going to be represented by this Service
  # The service becomes a network endpoint for either other services
  # or maybe external users to connect to (eg browser)
  selector:
    app: webapp

  ports:
    - name: http
      port: 80
      nodePort: 30080

  type: NodePort
Let’s review all microservice deployments before we open the app.
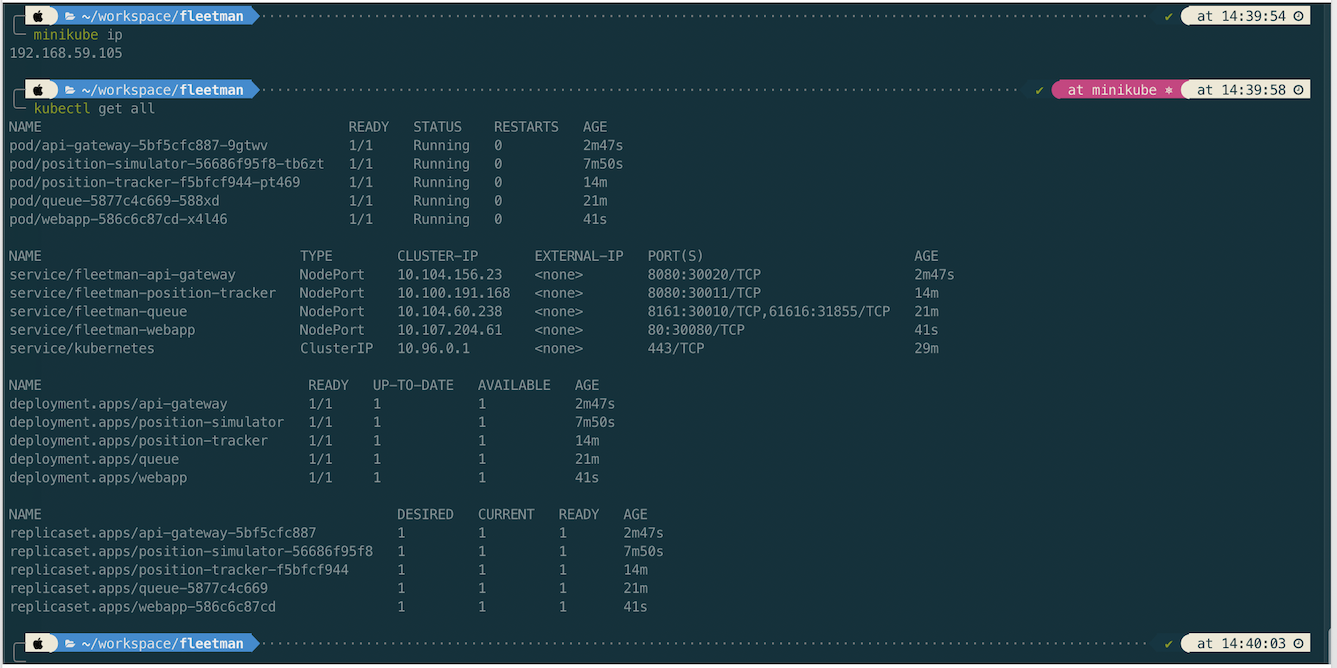
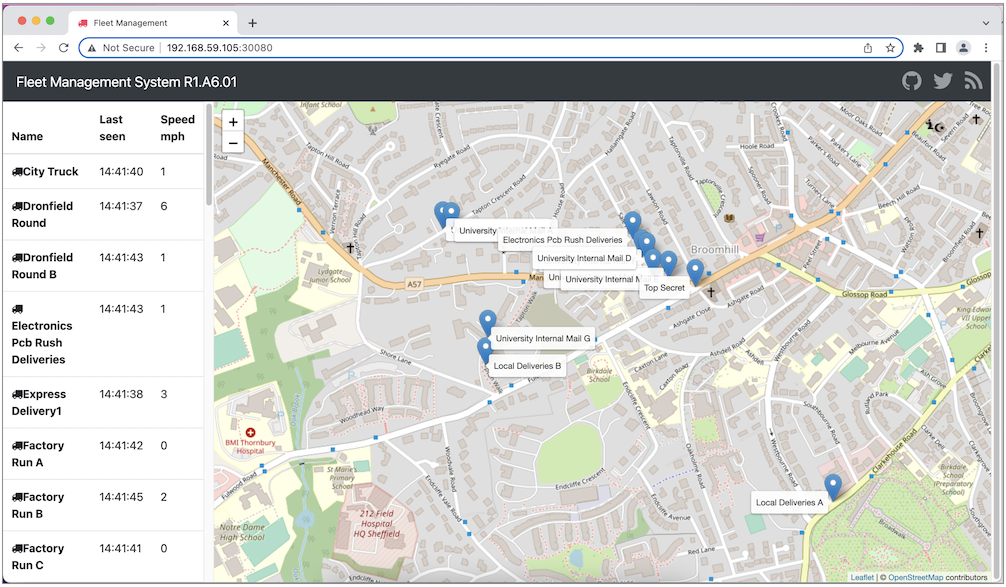
Lastly we can open the app in browser http://192.168.59.105:30080/
Investigating Kubernates Log
If we get an error on resource we can chek
# get pod description including kubernetes message while creating/updating the pod
kubectl describe pod position-simulator-56686f95f8-tb6zt

# get the application log (spring log)
kubectl logs api-gateway-5bf5cfc887-9gtwv
kubectl logs position-simulator-56686f95f8-tb6zt

# get the application log by following the log
kubectl logs -f position-simulator-56686f95f8-tb6zt
References
- https://github.com/DickChesterwood/k8s-fleetman/tree/release0-reconstruction-branch
- https://www.nginx.com/blog/microservices-at-netflix-architectural-best-practices/