10 Aug 2012
•
macos
•
php
In the previous post, we have installed Apache, PHP and MySQL on OS X 10.8. To do administration of mySQL database we can use various app. One of the tool that usually use by programmer to do that is phpMyAdmin. It is a free opensource web app that’s used to manage MySQL database. Let’s install it now.
The first thing that we need to do is open terminal and type
# symbolic link for mysql
sudo mkdir /var/mysql

sudo ln -s /tmp/mysql.sock /var/mysql/mysql.sock
Extract the downloaded phpMyAdmin-3.5.2.1-english.zip into web folder and rename as phpMyAdmin. So now we should have ~/Sites/phpMyAdmin directory.
On browser, open : http://localhost/~username/phpmyadmin
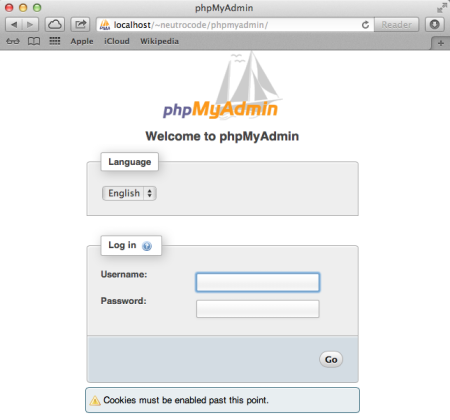
Now we can login and administer MySQL database.
09 Aug 2012
•
macos
•
mysql
To install mysql the first thing that we need to do is download mysql installer on the mysql website. In that web site we can see several versions of mysql. We will use Mac OS X ver. 10.6 (x86, 64-bit), DMG Archive. When we open the mysql-5.5.27-osx10.6-x86_64.dmg file, we will find 3 package installers.

Install all the three packages with the following order :
- mysql-5.5.27-osx10.6-x86_64.pkg
- MySQLStartupItem.pkg
- MySQL.prefPane
To start/stop MySQL we can use GUI tool from System Preferences > MySQL
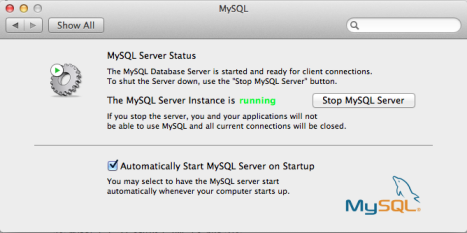
We can also start/stop MySQL via terminal
# start mysql
sudo /usr/local/mysql/support-files/mysql.server start
# stop mysql
sudo /usr/local/mysql/support-files/mysql.server stop
# get mysql version
sudo /usr/local/mysql/bin/mysql -v
In order to use MySQL command without have to specify MySQL installation full path, we need to add MySQL installation directory to shell path.
# bash profile
cd ~
vi .bash_profile
export PATH="/usr/local/mysql/bin:$PATH"
Then reload the new PATH
# test get mysql version
mysql -v
# set mysql password
cd ~
/usr/local/mysql/bin/mysqladmin -u root password 'yourpassword'
09 Aug 2012
•
macos
•
php
On the previous post, we have set up apache on OS X Mountain Lion. In this post we will continue to install php module to run with apache on Mountain Lion. PHP actually is shipped in OS X 10.8. The first step is edit httpd.conf in apache directory.
# httpd configuration
sudo vi /etc/apache2/httpd.conf
Uncommect (remove #) php module declaration
LoadModule php5_module libexec/apache2/libphp5.so
# restart apache
sudo apachectl restart
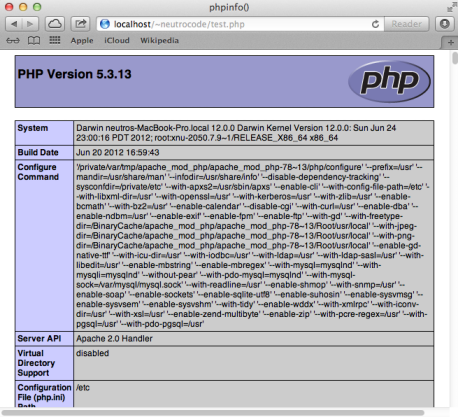
To see and test PHP create a file with the content, and save in /Users/username/Sites as “test.php”. Then open in browser http://localhost/~username/test.php
// test.php
<?php phpinfo(); ?>
08 Aug 2012
•
macos
•
apache
After installing Mountain Lion on my Macbook, I decided to prepare and set up software development tools in it. One of it is activate web sharing feature which can be found at System Preferences > Sharing on previous version. I was very suprise that apple seems remove it from the list.
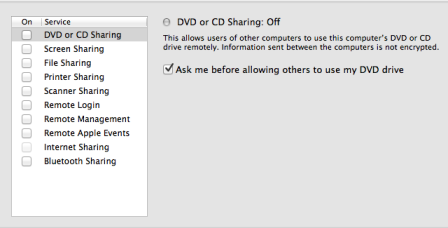
By searching some references on internet, here are the things that I did. Apache actually is pre-installed on Mountain Lion and we just need to enable it via the command line.
# start apache server
sudo apachectl start
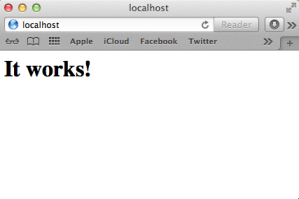
We will be asked to enter login password for starting it. Enter a password then open in browser localhost website. You should get the following display
# stop apache server
sudo apachectl stop
# get apache version
httpd -v
Historically, OSX has had 2 web roots. One at a system level and the other one at a user level. The user level one allows multiple acounts to have their own web root whilst the system one is global for all users. The location of system web document root is at
/Library/WebServer/Documents/
On the other hand, the user level web roots in the previous version of OSX (Lion) can be found under ~/Sites. But we can not find that directory anymore in Mountain Lion. So we need to create it manually.
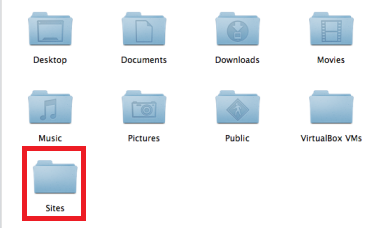
In terminal type:
cd /etc/apache2/users
vi username.conf
Edit username.conf in vi editor as is the following code:
<Directory "/Users/username/Sites/">
Options Indexes MultiViews
AllowOverride None
Order allow,deny
Allow from all
</Directory>
Then create html page inside ~/Sites to test our user local website and save it as index.html
<!DOCTYPE html PUBLIC "-//W3C//DTD HTML 4.01//EN" "http://www.w3.org/TR/html4/strict.dtd">
<html>
<head>
  <meta http-equiv="Content-Type" content="text/html; charset=utf-8">
  <meta http-equiv="Content-Style-Type" content="text/css">
  <title></title>
  <meta name="Generator" content="Cocoa HTML Writer">
  <meta name="CocoaVersion" content="1187">
  <style type="text/css">
  </style>
</head>
<body>
<h1><b>It works!</h1>
<h1><b>I am on local user website</b></h1>
</body>
</html>
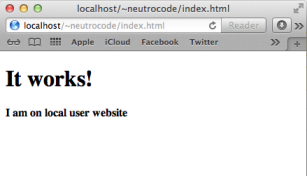
Congratulation your apache is running well now :)
06 Aug 2012
Couple days ago I got a task to migrate user from an existing website which build based on Jomla CMS to an ASP.NET website user. Both of them use different encryption technique. The plan was that the Jomla based website would be replaced with the .NET website. In sort the scenario was :
- Replace PHP website build on top Jomla CMS with .NET
- Migrate users from Jomla so they can login into the new .NET website using old password
- Migrate some roles
The first thing that come to my mind is to check whether they use the different encryption algorithm or not. And yup…they use different algorithm :( . So I decide to extend the MembershipProvider used by the .NET. In my case, thankfully I just need to override one method on that is ValidateUser. I will not talk the the detail what inside the methods is. The main point is just to validate if user login using existing password created by jomla can be validated by the .NET. To do that I create a simple class called JomlaEncryption to validate if user enter valid Jomla password.
public class JomlaEncryption
{
    public static bool IsValidPassword(string password, string encryptedPassword)
    {
        return EncryptUsingJomlaAlgorithm(password, encryptedPassword) == encryptedPassword;
    }

    /// <summary>
    /// Source : http://stackoverflow.com/questions/2727043/using-php-to-create-a-joomla-user-password
    ///   From joomla Forum, that's what happen behind:
    ///
    ///   1. Generate a password
    ///   2. Generate 32 random characters
    ///   3. Concatenate 1 and 2
    ///   4. md5(3)
    ///   5. store 4:2
    ///   Example:
    ///
    ///   1. Generate a password - we'll use 'password'
    ///   2. Generate 32 random characters - we'll use 'WnvTroeiBmd5bjGmmsVUnNjppadH7giK'
    ///   3. Concatenate 1 and 2 - passwordWnvTroeiBmd5bjGmmsVUnNjppadH7giK
    ///   4. md5(3) - 3c57ebfec712312f30c3fd1981979f58
    ///   5. store 4:2 - 3c57ebfec712312f30c3fd1981979f58:WnvTroeiBmd5bjGmmsVUnNjppadH7giK
    /// </summary>
    /// <param name="password">
    /// <returns></returns>
    static string EncryptUsingJomlaAlgorithm(string password, string encryptedPassword)
    {
        if (!encryptedPassword.Contains(":"))
            return null;

        string randChar32Bit = encryptedPassword.Split(':')[1];
        if (string.IsNullOrEmpty(randChar32Bit) || randChar32Bit.Length != 32)
            return null;

        string concatePassAndRandChar32Bit = password + randChar32Bit;
        string hashedConcatePassAndRandChar32Bit = MD5(concatePassAndRandChar32Bit);

        return string.Format("{0}:{1}", hashedConcatePassAndRandChar32Bit, randChar32Bit);
    }

    static string MD5(string password)
    {
        byte[] bytes = System.Text.Encoding.Default.GetBytes(password);
        try
        {
            System.Security.Cryptography.MD5CryptoServiceProvider cryptProvider;
            cryptProvider = new System.Security.Cryptography.MD5CryptoServiceProvider();
            byte[] hash = cryptProvider.ComputeHash(bytes);
            string ret = string.Empty;
            foreach (byte a in hash)
            {
                if (a < 16)
                    ret += "0" + a.ToString("x");
                else
                    ret += a.ToString("x");
            }
            return ret;
        }
        catch
        {
            throw;
        }
    }
}
That’s all for now and thanks for reading :)


