
Sometime we get into a condition in which we need to create POJO classes from an existing database. It could take time if the database has many tables. Instead of manually create them, we could use Hibernate Tool. Hibernate Tools is an eclipse plugin that can be installed from the eclipse marketplace.
In this post, we use Spring Tool Suite (STS) 4 instead of directly use the eclipse version of the IDE. Meanwhile the database we use is PostgreSQL. It should be applicable to any other database.
The steps of using Hibernate Tools is summarized as follow. I append many screenshots on this post in order the steps are easier to follow.
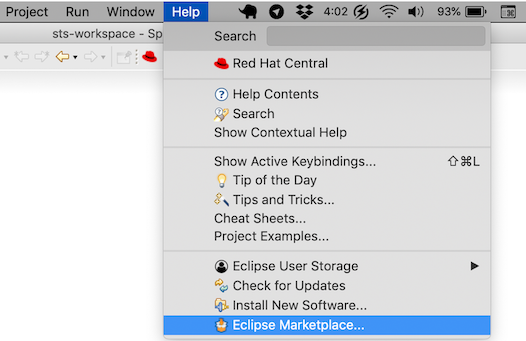
Step 1 : Install Hibernate Tools plugin
To install Hibernate Tools plugin, go to menu Help > Eclipse Marketplace .
Enter Hibernate Tools in the search field.
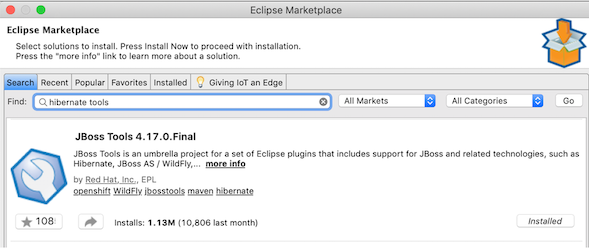
Follow the installation step until the installation success and finish. Eclipse will show us a pop up message to restart it once the installation finished.
Step 2 : Create Java Maven project
Before building a connection to the database, we will create a maven project that contains a hibernate configuration file and where the generated code will be placed. The following figures show the maven project configuration setting.
First, ensure we are in the Java persepective mode. From the menu File > New > Other... select Maven Project as the following figure.

Select the checked box of Create a simple project then press Next.

Fill the Group Id and Artifact Id. Select jar for the Packaging option, then click Finish

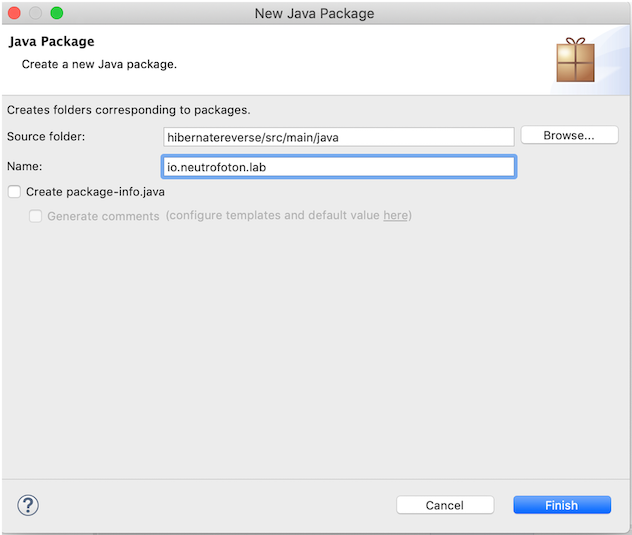
Create a namespace in the maven project where the generated code will be placed.
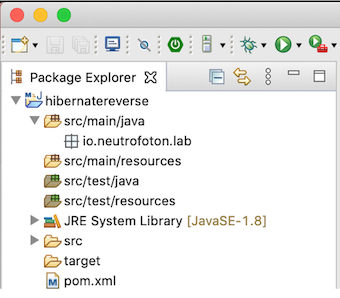
The project structure should look like the following picture.
Once the project skeleton constructued, edit the pom.xml by adding dependencies of the hibernate and database driver. The latest jar version could be found in Maven Repository
<project xmlns="http://maven.apache.org/POM/4.0.0" xmlns:xsi="http://www.w3.org/2001/XMLSchema-instance" xsi:schemaLocation="http://maven.apache.org/POM/4.0.0 https://maven.apache.org/xsd/maven-4.0.0.xsd">
  <modelVersion>4.0.0</modelVersion>
  <groupId>io.neutrofoton.lab</groupId>
  <artifactId>hibernatereverse</artifactId>
  <version>0.0.1-SNAPSHOT</version>

 <dependencies>

 	<dependency>
	    <groupId>org.hibernate</groupId>
	    <artifactId>hibernate-core</artifactId>
	    <version>5.4.24.Final</version>
	</dependency>

	<dependency>
	    <groupId>org.postgresql</groupId>
	    <artifactId>postgresql</artifactId>
	    <version>42.2.18</version>
	</dependency>


 </dependencies>
</project>
Step 3 : Create Hibernate configuration
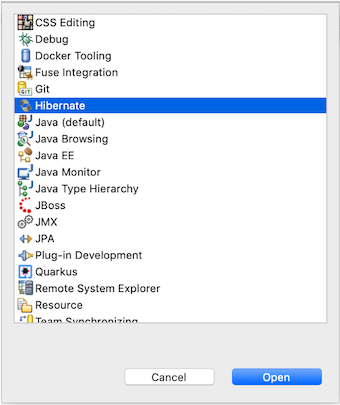
Before creating Hibernate configuration file, we need to switch to Hibernate perspective in the eclipse by opening menu Window > Perspective > Open Perspective > Other.... Then select Hibernate on the perspective list.
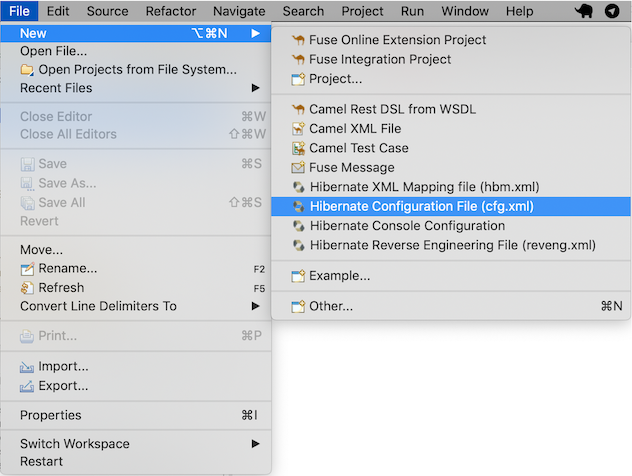
Once we are in the Hibernate perspective, we can create Hibernate configuration from menu File > Hibernate Configuration File (*.cfg.xml)
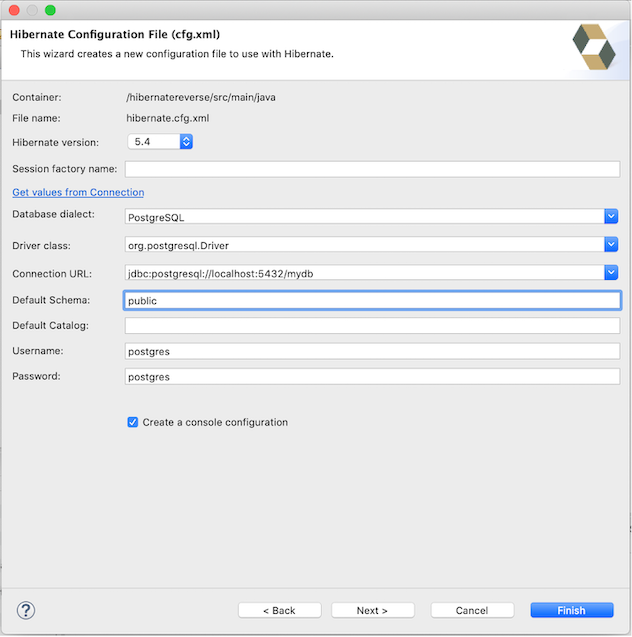
Placed the configuration file in the directory src/main/java, then click Next.

On the next dialog wizard, fill the configuration item according to our database specification. The database specification items to fill are database dialect, database driver, connection URL, default schema (if we want to generate for a specific schema, otherwise left it empty if we want to generate for all), username and password. On the dialog wizard, ensure to select the check box of Create a console configuration option.
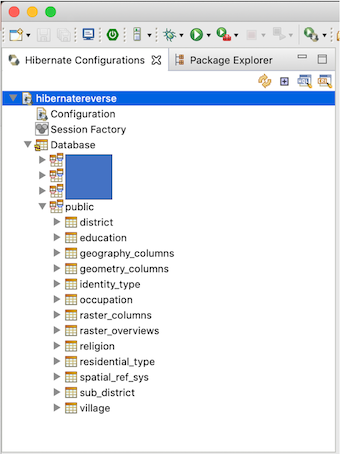
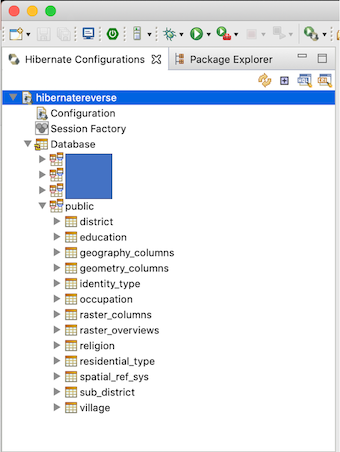
In the Hibernate Configurations pane, the hibernate configuration that has been created should be listed in it. If the created hibernate configuration is not listed, press the Refresh or Rebuild configuration button in the top right corner of the pane. The generated Hibernate configuration should look like the following figure. We could expand the Database element on the Hibernate configuration to ensure we have a valid database connection.
Step 4 : Run Hibernate code generation
To run Hibernate code generation, ensure we select the active Hibernate Configuration in the Hibernate configuration pane. Then, open the menu of Run > Hibernate Code Generation Configuration...
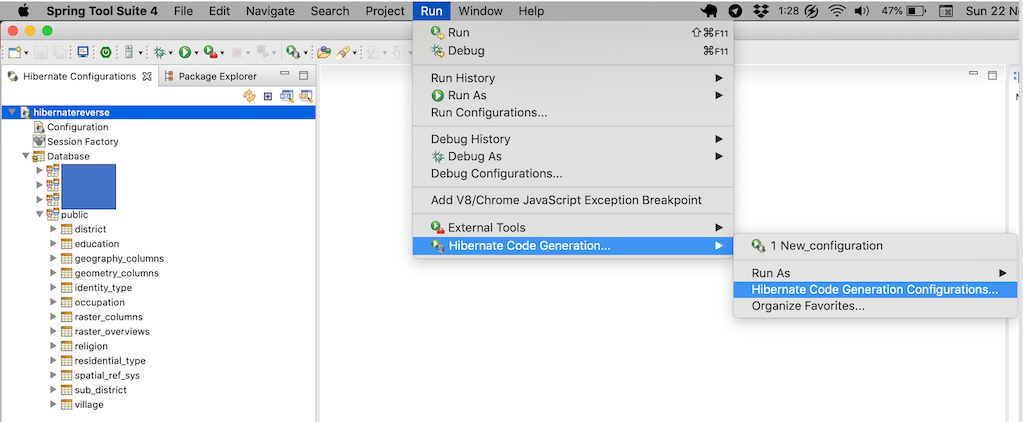
In the Hibernate Code Generation Configuration, fill the package where the domain class will be in.
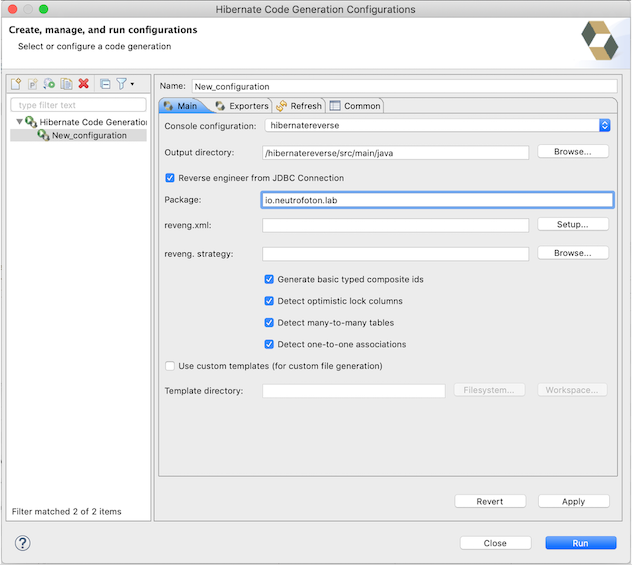
In the Exporter tab, select Use Java 5 syntax and Generate EJB3 annotations. In the exporter list option, we can select items in the list that we need. In this post we only select Domain code that has annotation as Hibernate mapping. Finally click Apply and Run to generate the domain code.

NOTES:
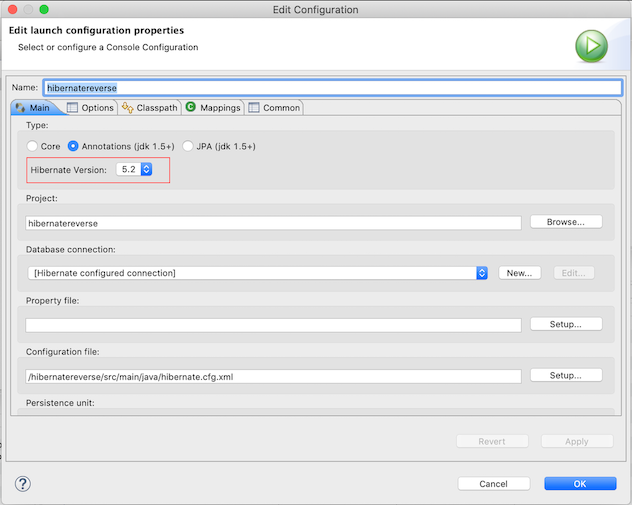
If the annotation does not generated in the domain class, open the Hibernate Configuration and edit it. Then change the Hibernate Version to 5.2. Finally run again as we have done on step 4.
References
- https://docs.jboss.org/tools/4.1.0.Final/en/hibernatetools/html_single/index.html
- https://stackoverflow.com/questions/50837574/annotation-not-created-when-generating-hibernate-mapping-files
- https://www.youtube.com/watch?v=KO_IdJbSJkI&ab_channel=CodeJava