
About Deployment
In most cases we don’t want to work with Pods directly. As well as ReplicaSet, we might want to work with Deployment instead. A Deployment provides declarative updates for Pods and ReplicaSets.
Basically it’s a more sophisticated form of ReplicaSet. It is a ReplicaSet with an additional feature. With a Deployment, we get automatic rolling updates with zero downtime.
In the previous section of Service, we did a rolling deployment by changing the labels of selector in the service. The rolling updates was zero downtime. But with Deployment we have more elegant way without have to manual change the selector label. We could also do rollback if something goes wrong.
Note:
Do not manageReplicaSetsowned by aDeployment.
Creating Deployment
The yaml structure of Deployment is similar with ReplicaSet. To demonstrate the Deployment creation, let’s delete the previous ReplicaSet and Service.
kubectl delete rs webapp
kubectl delete svc fleetman-webapp
In creating a Deployment we can copy the previous ReplicaSet yaml and modify the kind element. To make it more closer to real condition, we will remove the release in the Pod label and Service selector. Since we should not tightly to any specific version.
The first deployment, we will use release0 tag of the docker image. We also make slightly increase the number of replica to 2.
apiVersion: apps/v1
kind: Deployment
metadata:
  name: webapp
spec:
  replicas: 2
  selector:
    matchLabels:
      app: webapp
  template: # template for the pod
    metadata:
      labels:
        app: webapp
    spec:
      containers:
      - name: webapp
        image: richardchesterwood/k8s-fleetman-webapp-angular:release0

---
apiVersion: v1
kind: Service
metadata:
  name: fleetman-webapp
  namespace: default
spec:
  # This defines which pods are going to be represented by this service
  # The service becomes a network endpoint for either other services
  # or maybe external users to connect to (browser)
  selector:
    app: webapp # can be any selector according to the label defined in pod ex: myapp:webapp
  ports:
  - name: http
    port: 80
    # the nodeport should be greater than 30000
    nodePort: 30080
  type: NodePort
The next steps are saving the above yaml as deployment.yaml and executing it to create deployment.
kubectl -f apply deployment.yaml
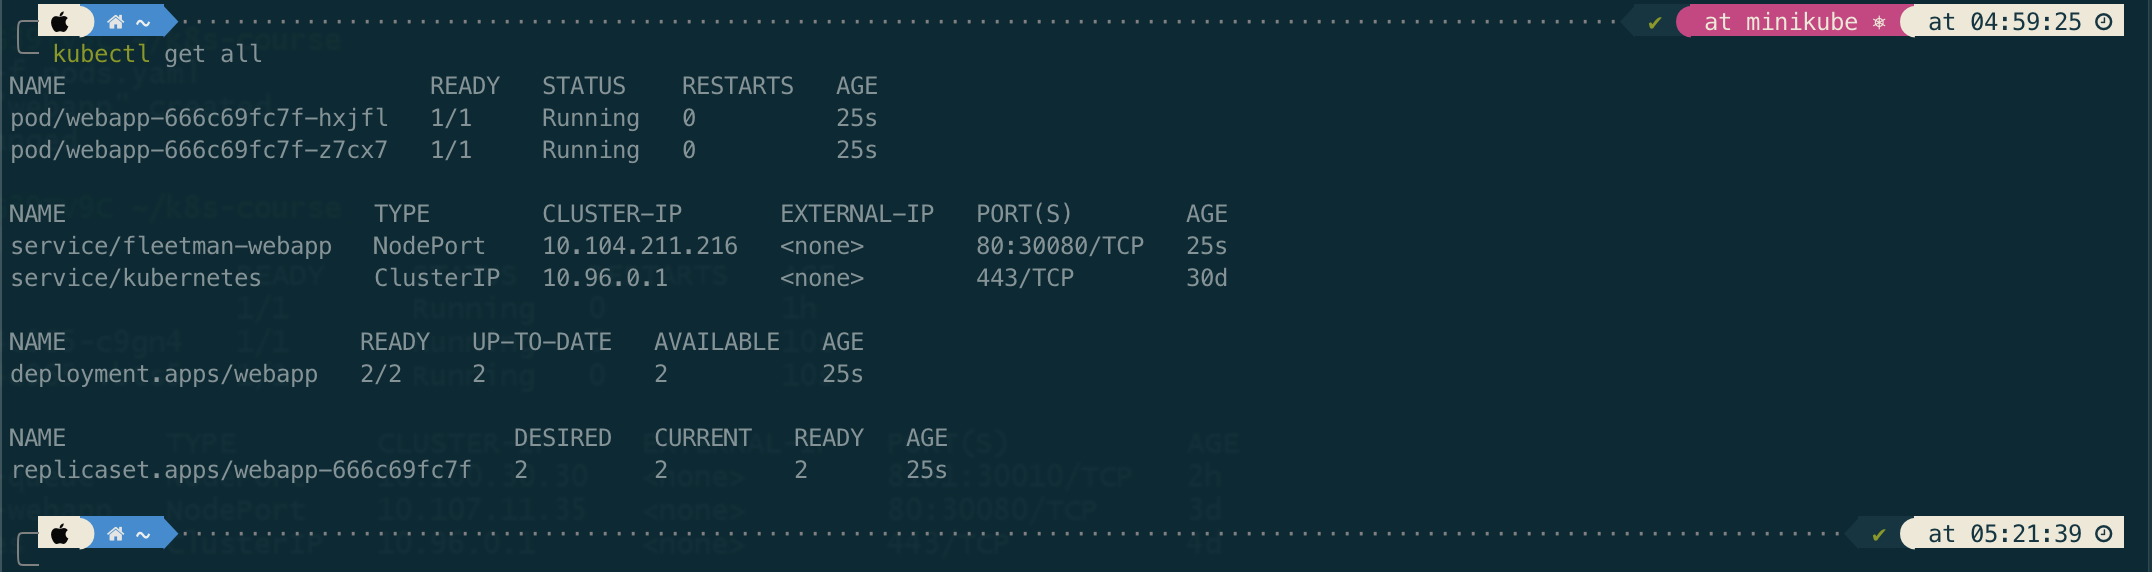
If we notice, a Deployment will create a corresponding a ReplicaSet. Meanwhile, the ReplicaSet will create corresponding Pods.
We can think that a Deployment is an entity in Kubernetes that manages the ReplicaSet for us. So from now we don’t need to work with the ReplicaSet directly, but we just need to work with Deployment instead.
Now, lets check and open in browser http://192.168.59.100:30080.
Rolling Deployment
In this section we will simulate how we do a rolling deployment without needing to fiddle around with lables like we did before.
To demonstrate it, let’s we update the tag of docker image to a new version release0-5.
apiVersion: apps/v1
kind: Deployment
metadata:
  name: webapp
spec:
  replicas: 2
  selector:
    matchLabels:
      app: webapp
  template: # template for the pod
    metadata:
      labels:
        app: webapp
    spec:
      containers:
      - name: webapp
        image: richardchesterwood/k8s-fleetman-webapp-angular:release0-5

---
apiVersion: v1
kind: Service
metadata:
  name: fleetman-webapp
  namespace: default
spec:
  # This defines which pods are going to be represented by this service
  # The service becomes a network endpoint for either other services
  # or maybe external users to connect to (browser)
  selector:
    app: webapp # can be any selector according to the label defined in pod ex: myapp:webapp
  ports:
  - name: http
    port: 80
    # the nodeport should be greater than 30000
    nodePort: 30080
  type: NodePort
Then apply the updated deployment.yaml and compare the previous entities to the updated ones.
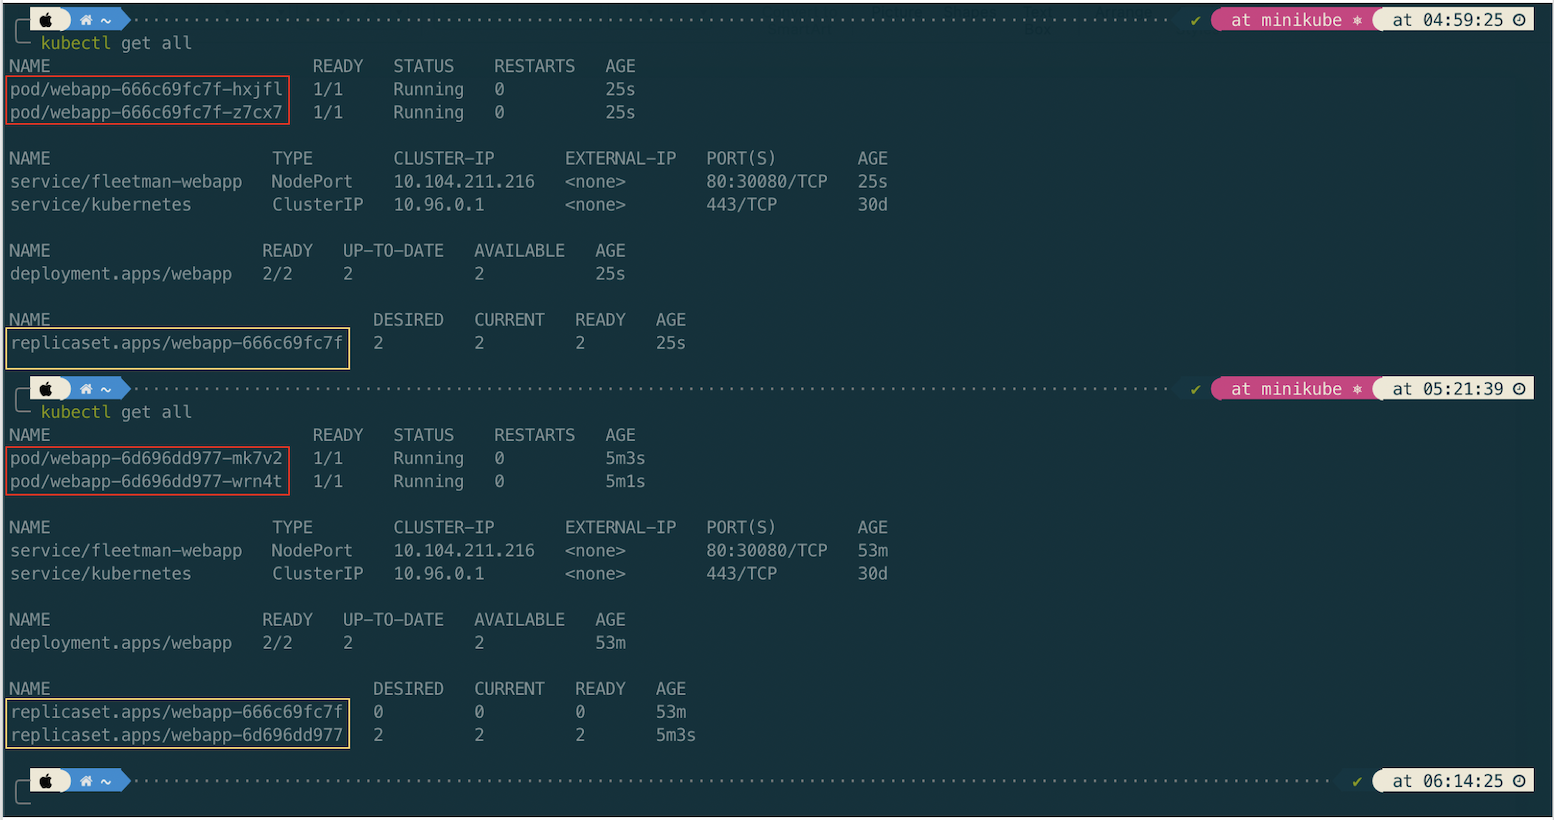
Now, lets check the updated app by opening in browser http://192.168.59.100:30080. The app should be updated.
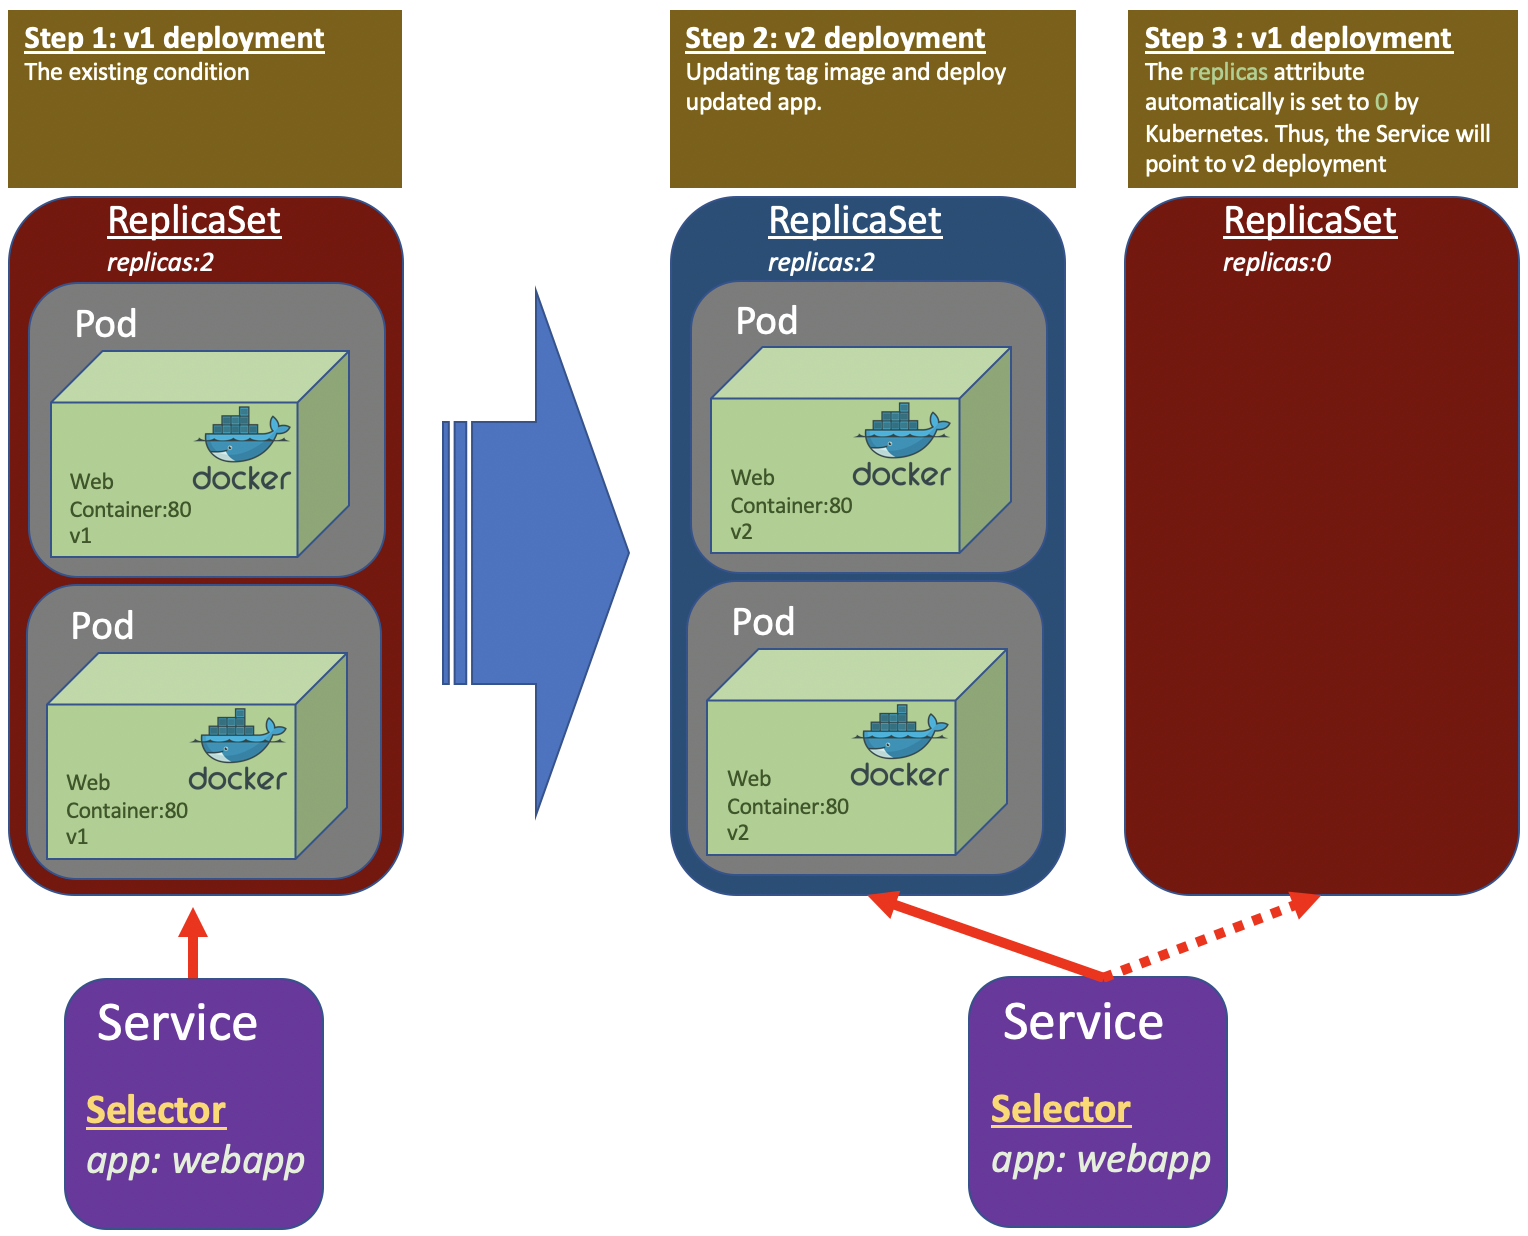
How the Deployment does the elegant way ilustrated in the following picture.
Managing Rollout
To check the rollout deployment status and history, run the commands.
# model 1
kubectl rollout status deployment webapp

# model 2
kubectl rollout status deploy webapp

kubectl rollout history deployment webapp
Rolling Back
To rollback deployment we can do with the following command
kubectl rollout undo deploy webapp --to-revision=1
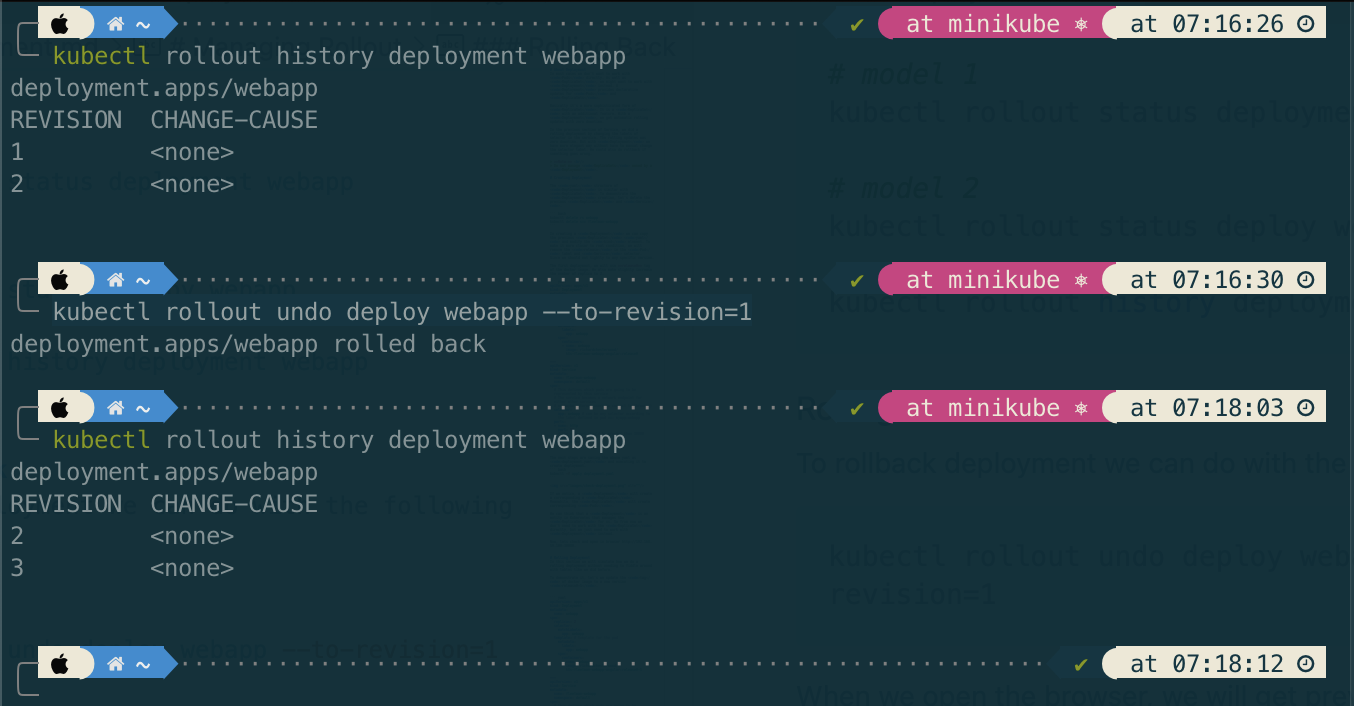
When we open the browser, we will get previous version. The revision number will keep increment as history tracking of Kubernates.
Tips
Applying annotation in deployment will fill out the column CHANGE-CAUSE which can inform us the reason on each deployment. Please see here